Black bars on both sides. Text cut off at the top. A great shot that suddenly feels… off. These are the problems you run into when the aspect ratio doesn’t match the platform, or worse, the viewer’s screen.
On YouTube, aspect ratio affects everything from how polished your video looks to how it performs in the algorithm. Get it right, and your content looks native, professional, and optimized. Get it wrong, and even your best footage can feel clunky or misplaced.
In this guide, we’ll break down exactly which aspect ratios to use, when to use them, and how to prep your content so it looks perfect.
The Core Aspect Ratios You Need to Know
Before you hit record, you need to know what shape your video will take.
Here are the main aspect ratios content creators work with on YouTube—and why each one matters:
16:9 – The YouTube Standard

This is the default for most YouTube videos. Think vlogs, tutorials, explainers, livestreams—pretty much everything uploaded in landscape. The dimensions are usually 1920x1080 (1080p) or 3840x2160 (4K). If you’re creating horizontal content for desktop and TV screens, stick with this.
9:16 – The Vertical Format for Shorts

YouTube Shorts demand vertical video. The 9:16 ratio (usually 1080x1920) fills mobile screens and is required for Shorts to appear properly in the Shorts feed. Upload a 16:9 video here, and it’ll look awkward and small—or get cropped in ways you can’t control.
1:1 – Square Format (Optional)

Square video isn’t common on YouTube, but you might use it for embedded videos, community posts, or crossposting content from Instagram. The ratio is 1:1, usually at 1080x1080. It’s not recommended for performance-focused YouTube videos, but worth knowing for promos.
4:3 – Old School Format

You’ll see this mostly in older content or stylized projects that want a retro feel. While it doesn’t work well for modern YouTube layouts, as the typical resolution would be 1440x1080, so YouTube will add black bars unless you reformat it. That said, it's a stylistic choice that's having a bit of a comeback, so using this aspect ratio mindfully could work in your favor.
21:9 – Ultra-Wide or Cinematic
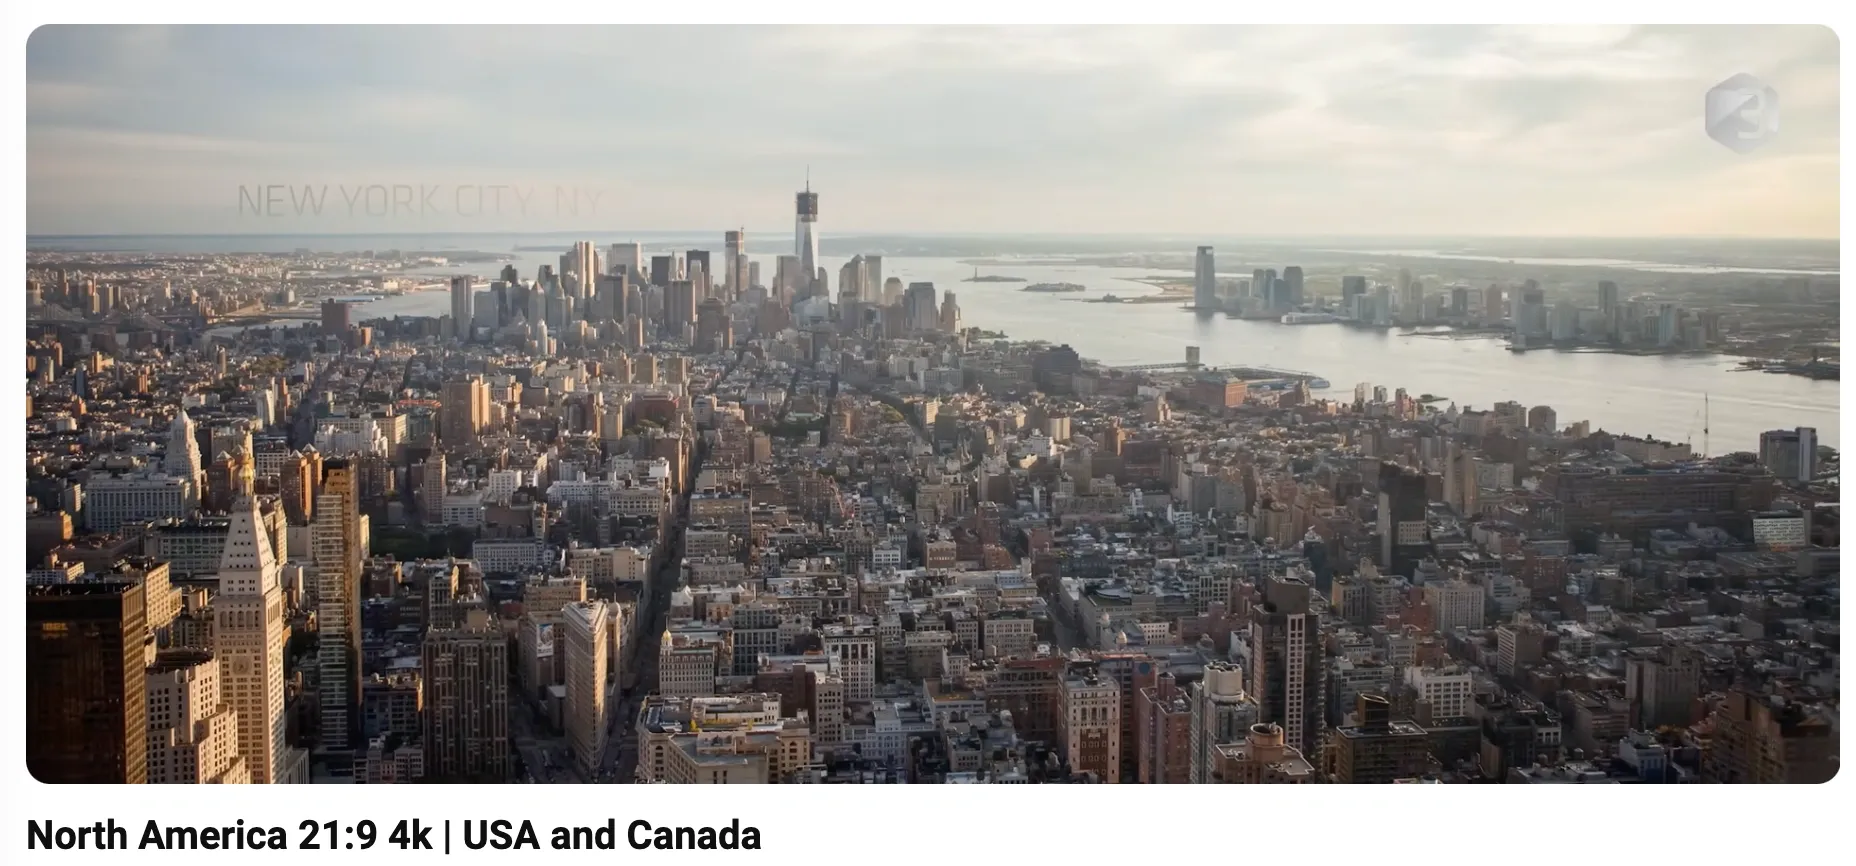
Used for film-style edits or high-end productions. This is wider than most screens, so it adds letterboxing (black bars) to fit into the YouTube player. Great for mood pieces, less ideal for tutorial-style content.
How Aspect Ratio Affects Viewer Experience
Simply put, a bad aspect ratio makes it harder to watch. Let’s say you upload a vertical video in a 16:9 landscape frame. On mobile, it’ll look tiny. On desktop, it’ll be surrounded by thick black bars. Either way, it feels like something’s off — and viewers tend to click away faster when a video feels off.
Here’s what happens behind the scenes:
1) YouTube auto-adjusts
YouTube will try to adapt your video to the screen it’s being played on. If you upload the wrong ratio, it might add padding, crop the frame, or shrink the video — none of which help your content shine.
2) Black bars hurt perception
When viewers see bars on the side or top of a video, it immediately feels dated or incorrectly formatted. Even if the content is great, it sends a signal that something’s “off.”
3) Text and visuals can get cut off
Especially in Shorts or mobile-first formats, text that sits too close to the edge of your frame can get chopped or blocked by overlays like subscribe buttons. That’s why safe zones matter — more on that later.
4) Watch time drops
If your video looks awkward or hard to follow, people leave. Even a 5% drop in retention can affect how your video ranks, gets recommended, or performs in search.
The bottom line? The right aspect ratio doesn’t just look better — it performs better. And it sets your content up to feel natural on the screen your audience is using.
Different Formats, Different Rules
Not all YouTube videos follow the same playbook, especially when it comes to format. Shorts, long-form videos, and livestreams each have their own quirks when it comes to aspect ratio. If you’re uploading without thinking about these differences, chances are you’re leaving views on the table.
1) Shorts (9:16 is non-negotiable)
While you could publish well-performing videos in 1:1 or 4:3, YouTube Shorts are preferably vertical. The ideal aspect ratio is 9:16, and the recommended resolution is 1080x1920. The only thing you'd really want to avoid is uploading a landscape video (16:9) to Shorts, as it will either get cropped awkwardly or look small with black bars. Neither is a good look.
Tips for YouTube Shorts
- Center your subject vertically and horizontally — YouTube’s UI can cover the edges
- Use large, easy-to-read text if you’re adding captions
- Test your Short on a phone before uploading — that’s where the vast majority of people will see it
2) Livestreams (16:9 is the standard)
For livestreams, stick to the classic 16:9 ratio — usually 1920x1080. YouTube’s live player is designed for this shape, and using anything else can result in weird black bars or letterboxing. If you’re using OBS, Streamlabs, or another streaming tool, make sure your canvas is set to the right dimensions before you go live.
Livestream Tips:
- Don’t switch between aspect ratios mid-stream
- Keep overlays (like chat or alerts) within the safe zone so they’re visible on all screens
- Test your stream on both desktop and mobile if possible
3) Premieres (format like regular uploads)
A Premiere works like a regular YouTube upload but with a scheduled countdown and live chat. It uses the same 16:9 aspect ratio as standard videos. But here’s the trick: because people are watching live, the experience feels more immersive. That makes poor framing or black bars even more noticeable.
Premiere Tips:
- Treat the visual layout like it’s going on the big screen, because it kind of is
- Use the countdown time to create a strong visual impression (branded graphics, motion titles, etc.)
- Keep text large and readable, especially in the first few seconds
Editing for the Right Aspect Ratio (Without Losing Quality)
Getting the aspect ratio right starts before you shoot. If you’re working with a camera, a phone, or screen recordings, setting up the right dimensions early on will save you time, frustration, and quality loss later as you go about editing your YouTube videos.
Let's take you through each step to get the perfect video using our video editor.
Step 1: Choose the right ratio before you record
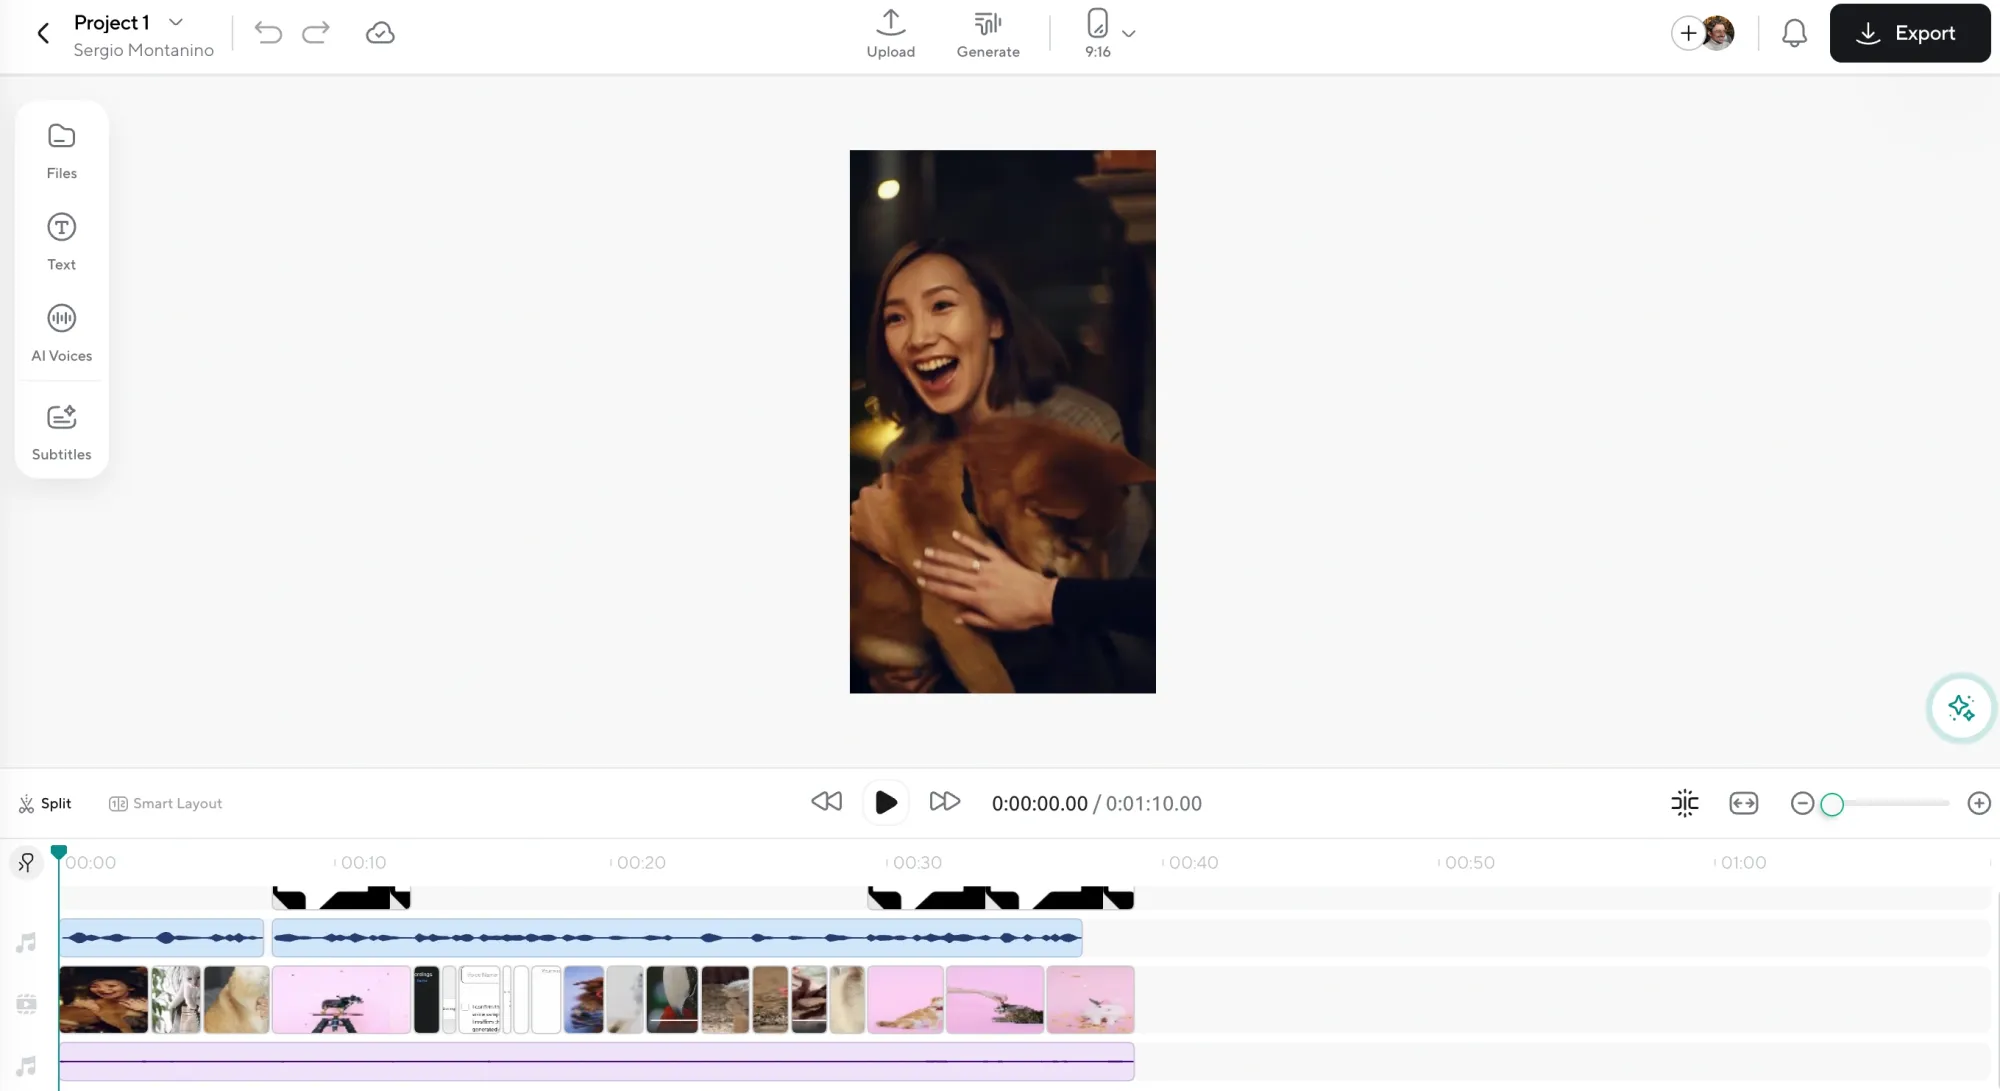
- Long-form YouTube videos → Shoot in 16:9
- Shorts or mobile-first content → Record in 9:16, 1:1 or 4:3
- Multi-purpose content (to be repurposed) → Frame your subject tightly in the center so you can crop both vertically and horizontally later
If you’re using a DSLR or smartphone, most camera apps let you pick your aspect ratio. Don’t skip this step as it avoids awkward cropping later.
Step 2: Set aspect ratio in your editing tool
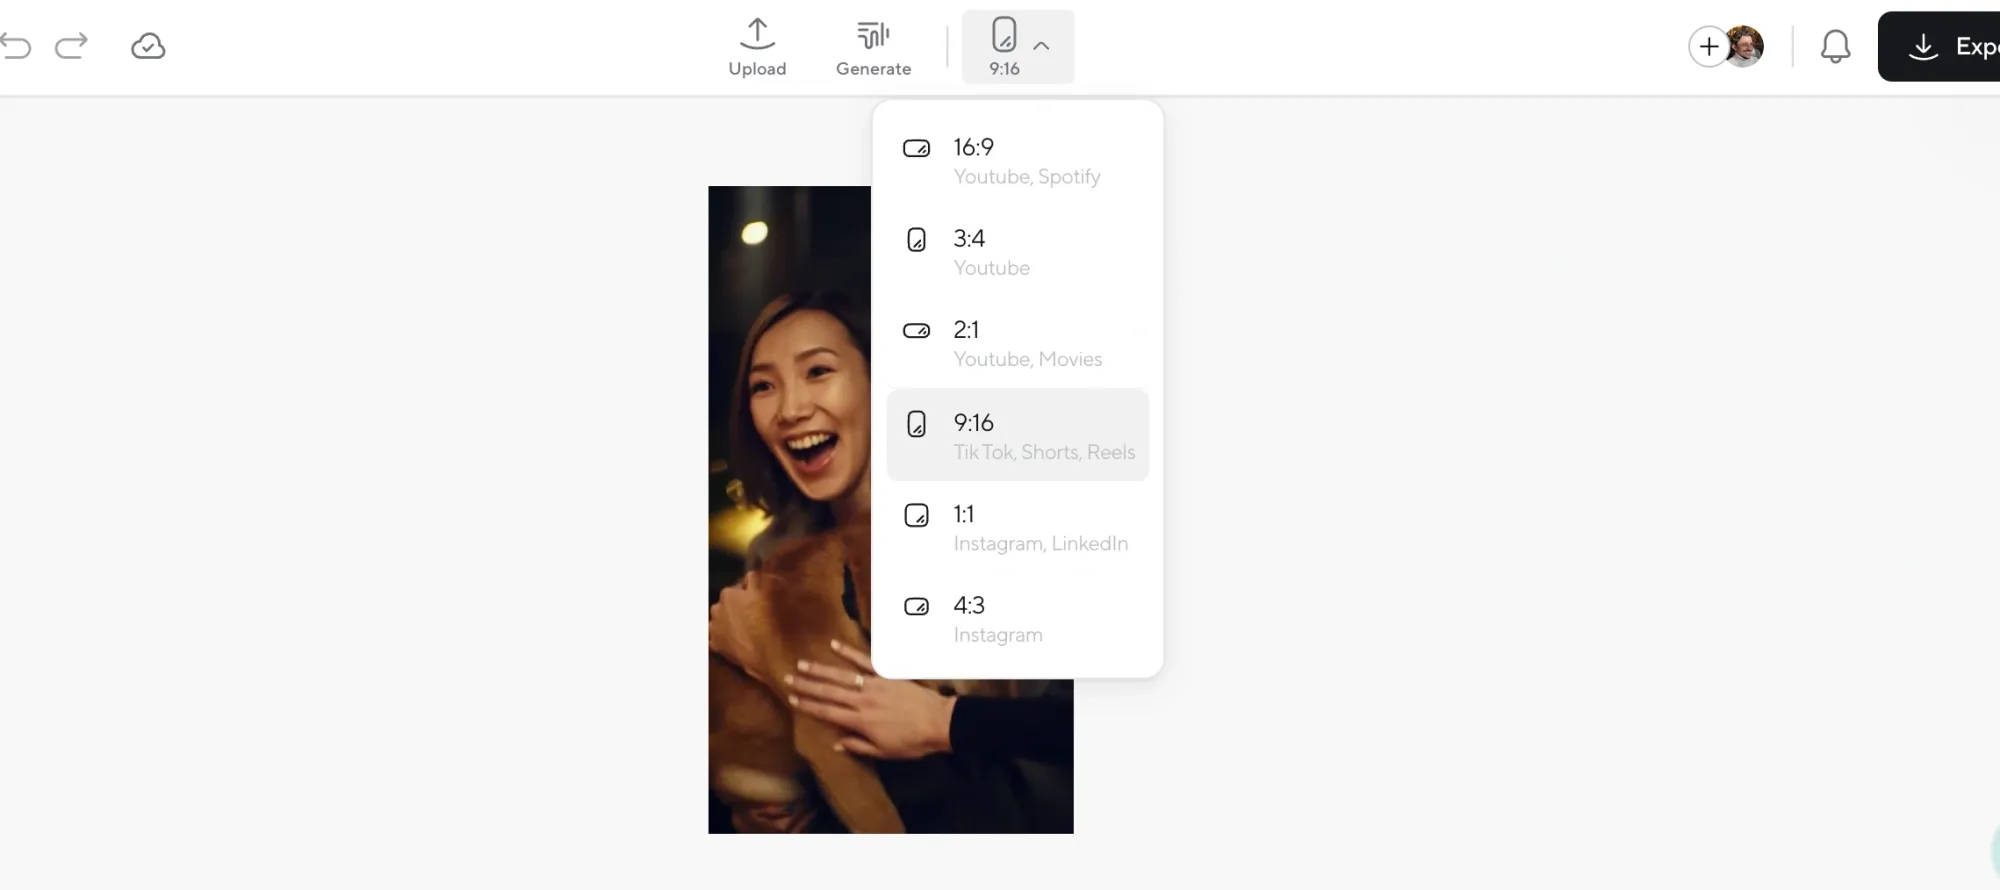
Some platforms let you resize your project with a single click. Others require you to manually adjust your timeline settings before you start. Either way, make sure the aspect ratio matches your intended format from the start, otherwise you’ll be fighting your footage in post.
Step 3: Crop and resize properly (don’t just zoom in)
When adjusting clips to fit a new aspect ratio, don’t rely on auto-zoom. That can ruin resolution or cut off important visuals. Instead:
- Use crop guides and safe zones to keep key subjects in frame
- Maintain original resolution when scaling down
- Avoid stretching video to “fill the screen”
Step 4: Export using the correct ratio and resolution
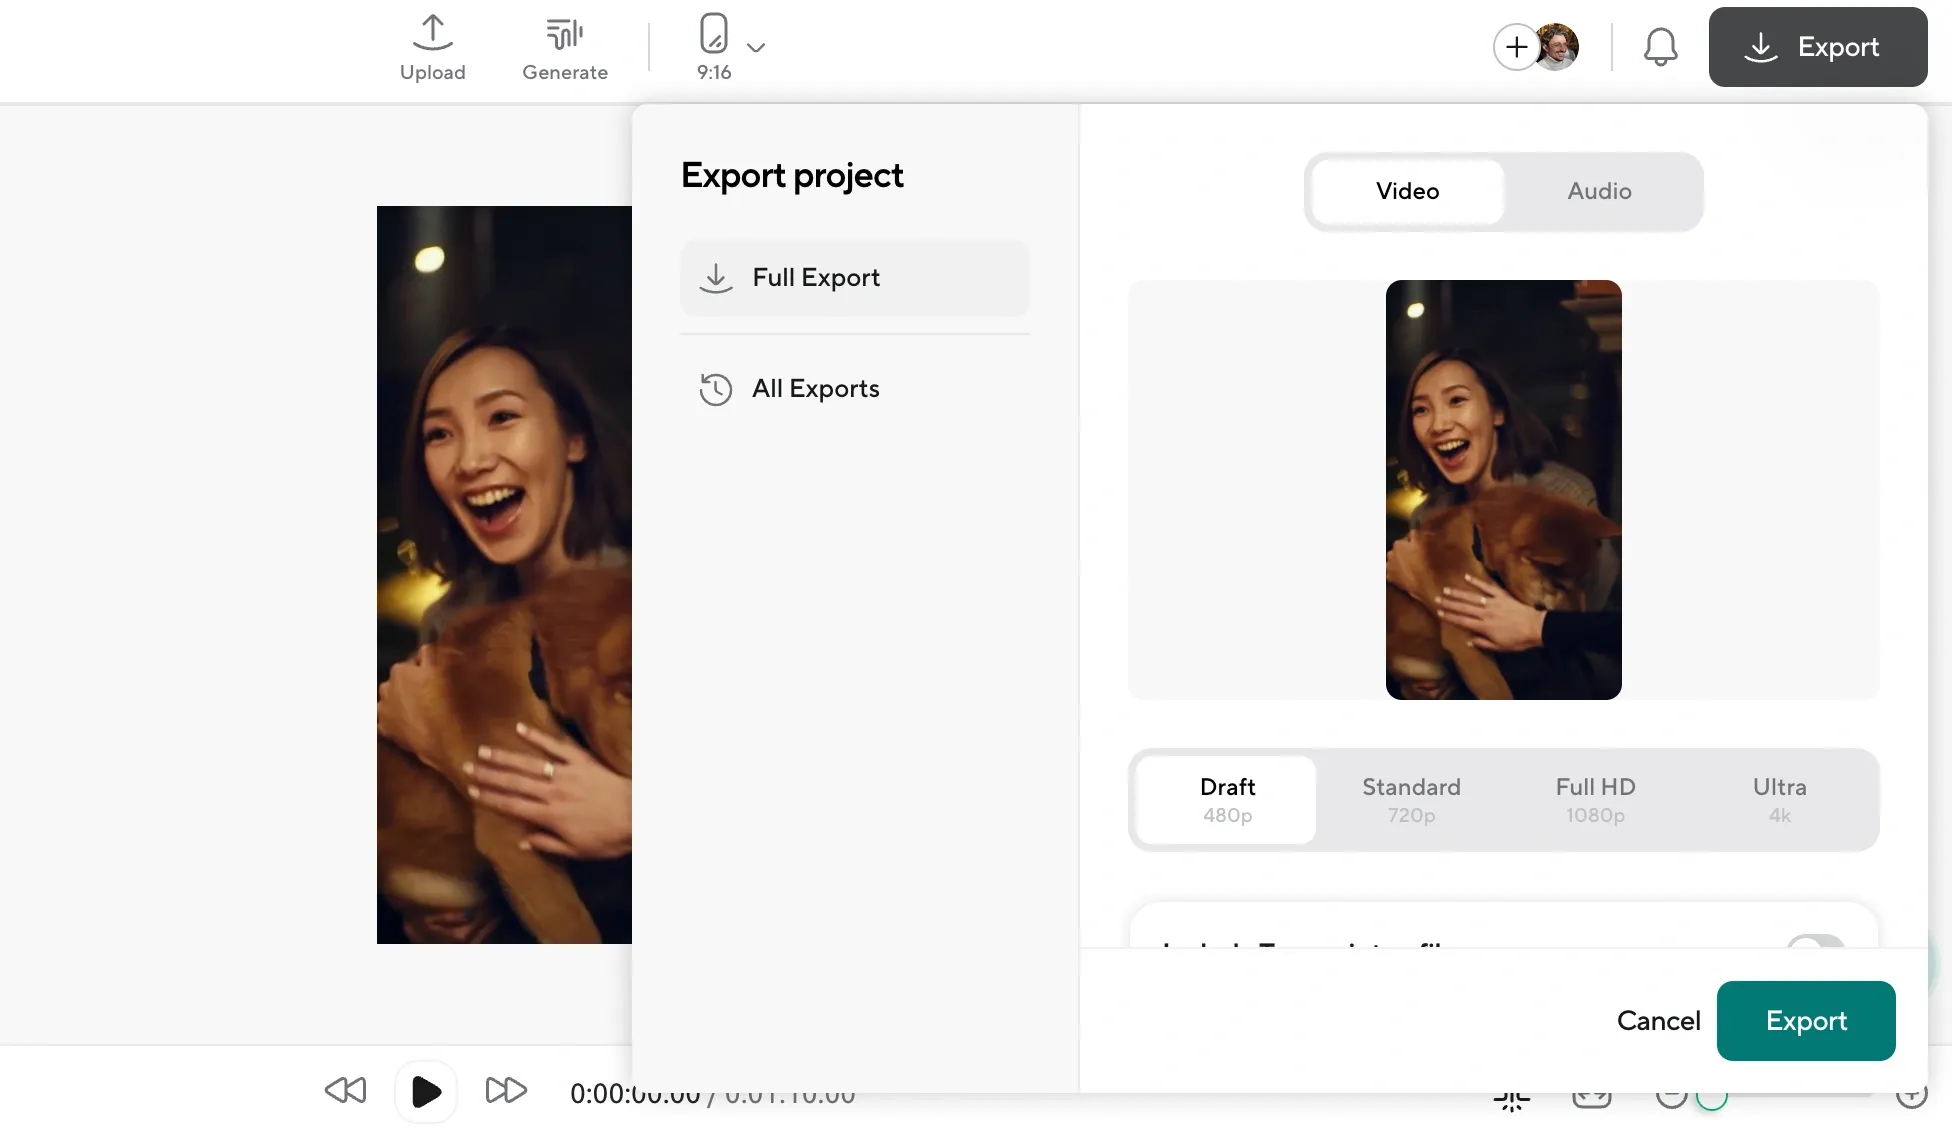
Your export settings need to match the timeline you edited in. If they don’t, YouTube will try to force the video into its standard player format. That’s where you might run into problems.
You could end up with:
- Black bars added to the sides or top of your video
- Unwanted cropping that cuts off important parts of the frame
- Reduced clarity if YouTube tries to scale your video up or down automatically
All of this might give your content the feel or look you weren't going for, even if it was perfectly edited. Matching your export settings to your timeline tells YouTube exactly how you want your video to appear, so it can display it cleanly across both desktop and mobile.
Repurposing Content for Multiple Platforms
Repurposing works best when you plan for it early and edit with flexibility in mind. Here’s how to do it without losing key visuals or wasting hours re-editing from scratch.
1) Start with flexible framing
If you’re shooting in 16:9 but want to make vertical clips later, keep your subject centered and avoid placing text or visuals too close to the edges. That way, when you crop to 9:16, nothing important gets cut off.
2) Use tools that simplify reframing
Some editing platforms offer auto-resizing features or Smart Layouts that reframe your video for different formats with minimal effort. These tools automatically adjust the crop to keep your subject in view and your text readable. No more dragging keyframes around by hand.
3) Be mindful of text placement and overlays
Text that looks great in a landscape layout might get sliced off in vertical. When adding captions or lower thirds, keep them within a central “safe zone” that works across formats. And avoid stacking too many visuals close to the top or bottom of the frame, especially for Shorts.
4) Work backwards from the platform
Ask yourself: where is this clip going? If it’s a Short, think mobile-first. If it’s a social promo, square might make sense. If it’s all of the above, consider building a few export templates that let you knock out each version without starting over every time.
Common Mistakes and How to Avoid Them
Even experienced creators run into problems with aspect ratio. It’s not always obvious until you upload and see the results. So here are some of the most common mistakes and how to avoid them.
1) Uploading vertical video inside a horizontal frame
This one’s easy to miss until you hit publish. You record a vertical video, maybe something for Shorts, but edit or export it in a 16:9 layout. YouTube doesn’t correct it for you. It just plays exactly what you give it: a tall video squished inside a wide frame, surrounded by thick black bars. On mobile, it looks tiny. On desktop, it feels like something’s wrong.
2) Forgetting about mobile viewers
A lot of creators design their content with a desktop monitor in mind, but the truth is, most YouTube traffic comes from phones. That means small text becomes unreadable, edge visuals get cut off, and certain framing choices just don’t work. A video might look polished on your laptop and still feel off on a phone screen. You can avoid that by previewing your video on mobile before publishing it. Look for things like caption size, clarity, and whether important visuals are blocked by the YouTube UI.
3) Cropping without using safe zones
When you reframe content from one aspect ratio to another, especially from landscape to vertical, it’s easy to lose important details. Text gets sliced in half. Faces shift off-center. Visual balance goes out the window. This happens when you crop blindly without using safe zones (the invisible boundary where content is guaranteed to be viewable across formats). If you’re planning to repurpose long-form videos into Shorts or social posts, always keep your subject and any essential graphics within that center zone.
4) Exporting with the wrong settings
You can shoot the perfect footage and still ruin it at the finish line. Low bitrates make your video look muddy. Mismatched resolutions lead to weird black bars or pixelation. And exporting at a resolution that doesn’t match your timeline? That’s a quick way to lose sharpness. Export settings are like the last safeguard between your final cut and how YouTube displays it. So before you export, double-check that the resolution, aspect ratio, and bitrate match the project you’ve been working in.
5) Ignoring repurposing until it’s too late
You film a great long-form video, and it does well. A week later, you try to turn it into a Short or a promo for Instagram, but now nothing fits. Your framing was too tight. The subject’s off to the side. There’s no way to crop it without ruining the shot. This is a common problem when repurposing is treated like an afterthought instead of part of the plan. Even if you’re not sure yet how you’ll reuse the footage, giving yourself that flexibility early on gives you far more options when the time comes.
Final Thoughts
Getting the aspect ratio right shouldn’t feel like a guessing game. It should be automatic. The truth is, every time you upload a video that’s even slightly off, you risk losing views, retention, and credibility. But with the right tools, that stress disappears.
Podcastle makes it easy to resize your video for any platform—without ruining the quality or spending hours in the edit. Whether you’re creating Shorts, livestreams, or long-form content, you can crop, reframe, and export in the perfect ratio with just a few clicks.
Want to see it for yourself? Try Podcastle for free and start turning sharp ideas into perfectly formatted content.
