You’ve got clips sitting in your phone. Old ones, random ones, the kind you forgot you even filmed. Some are five seconds long. Some have terrible lighting. Most don’t seem like much on their own.
But together? They might actually tell a story.
That’s what a video compilation does. It pulls different moments into one place and gives them context. Maybe you’re recapping a trip, collecting testimonials, or just trying to make something fun out of the chaos in your camera roll. Whatever your reason, the process is more doable than you’d think.
This guide walks you through it. We’ll cover how to plan your compilation, organize your clips, edit everything together with Podcastle, and keep things simple while still making it look good.
How to Make Video Compilations: 5 Things You Need
Here's the truth: most people dive straight into editing software and wonder why their compilation feels scattered or boring. The secret isn't in the fancy transitions or perfect colour grading, it's in the groundwork you do before you even open an editor.
Think of it like cooking. You wouldn't throw random ingredients into a pan and hope for the best. You'd think about what you're making, gather what you need, and have a rough plan. Video compilations work the same way.
1. Why Are You Making a Video Compilation?
Before you collect a single clip, get clear on what you're actually trying to accomplish. Are you documenting your kid's soccer season so grandparents can feel involved? Creating a showcase reel that shows off your skills? Putting together something that makes people laugh on a tough day?
Your purpose shapes everything else: how long the video should be, what clips to include, even how you'll arrange them. A compilation meant to entertain moves differently than one meant to inform or preserve memories.
2. What's the Red Thread Between Your Videos?
Random clips thrown together aren't a compilation, they're just chaos with a timeline. You need something that connects your footage, whether that's a shared theme, a progression through time, or an emotional arc.
Maybe it's "moments that made me smile this year" or "every time my cat knocked something over" or "client reactions that remind me why I love this job." The thread doesn't have to be profound, but it needs to be there. When someone watches your compilation, they should understand why these particular moments belong together.
3. Find Clips For Your Video Compilation
Now comes the fun part - collecting your clips. This is where you become a detective in your own digital life. Check your phone's camera roll, dig through old hard drives, scroll through social media posts you forgot about.
Don't just grab the obvious stuff. Sometimes the best compilation moments are the ones you almost deleted. These imperfect moments often carry more emotional weight than the polished ones.
If you're working with licensed footage or borrowing clips from other sources, make sure you understand the usage rights. Nothing kills a compilation's momentum like having to take it down later.
4. What's the Key Takeaway Of Your Video Compilation?
Even if your compilation isn't telling a traditional story, it needs some kind of structure. Maybe you're building toward a climax, or creating a rhythm that speeds up and slows down, or organizing chronologically to show change over time.
Ask yourself: What should people feel at the beginning versus the end? Should they laugh first and then get emotional? Should each clip top the last one? Should there be a quiet moment before the big finale? The order of your clips can completely change how people experience your compilation.
5. Use an AI Video Editor
Your editing software should feel like a helpful assistant, not a puzzle you need to solve. If you're spending more time figuring out how to do basic edits than actually creating, you're using the wrong tool.
Look for an editor that handles the technical heavy lifting while keeping the creative controls accessible.
Podcastle is designed exactly for this, it gives you professional-level features without the professional-level learning curve. You can focus on crafting your story instead of wrestling with complicated interfaces or rendering issues.
It’s essential to have tools that get out of your way so you can focus on what really matters: turning your scattered moments into something worth watching.
How to Make a Video Compilation with Podcastle: Step-by-Step Guide
You've got your clips and images, your plan, and your purpose. Now it's time to turn that pile of footage into something people actually want to watch.
Here's how to do it without losing your sanity or your creative vision.
1. Upload and Organize Your Clips
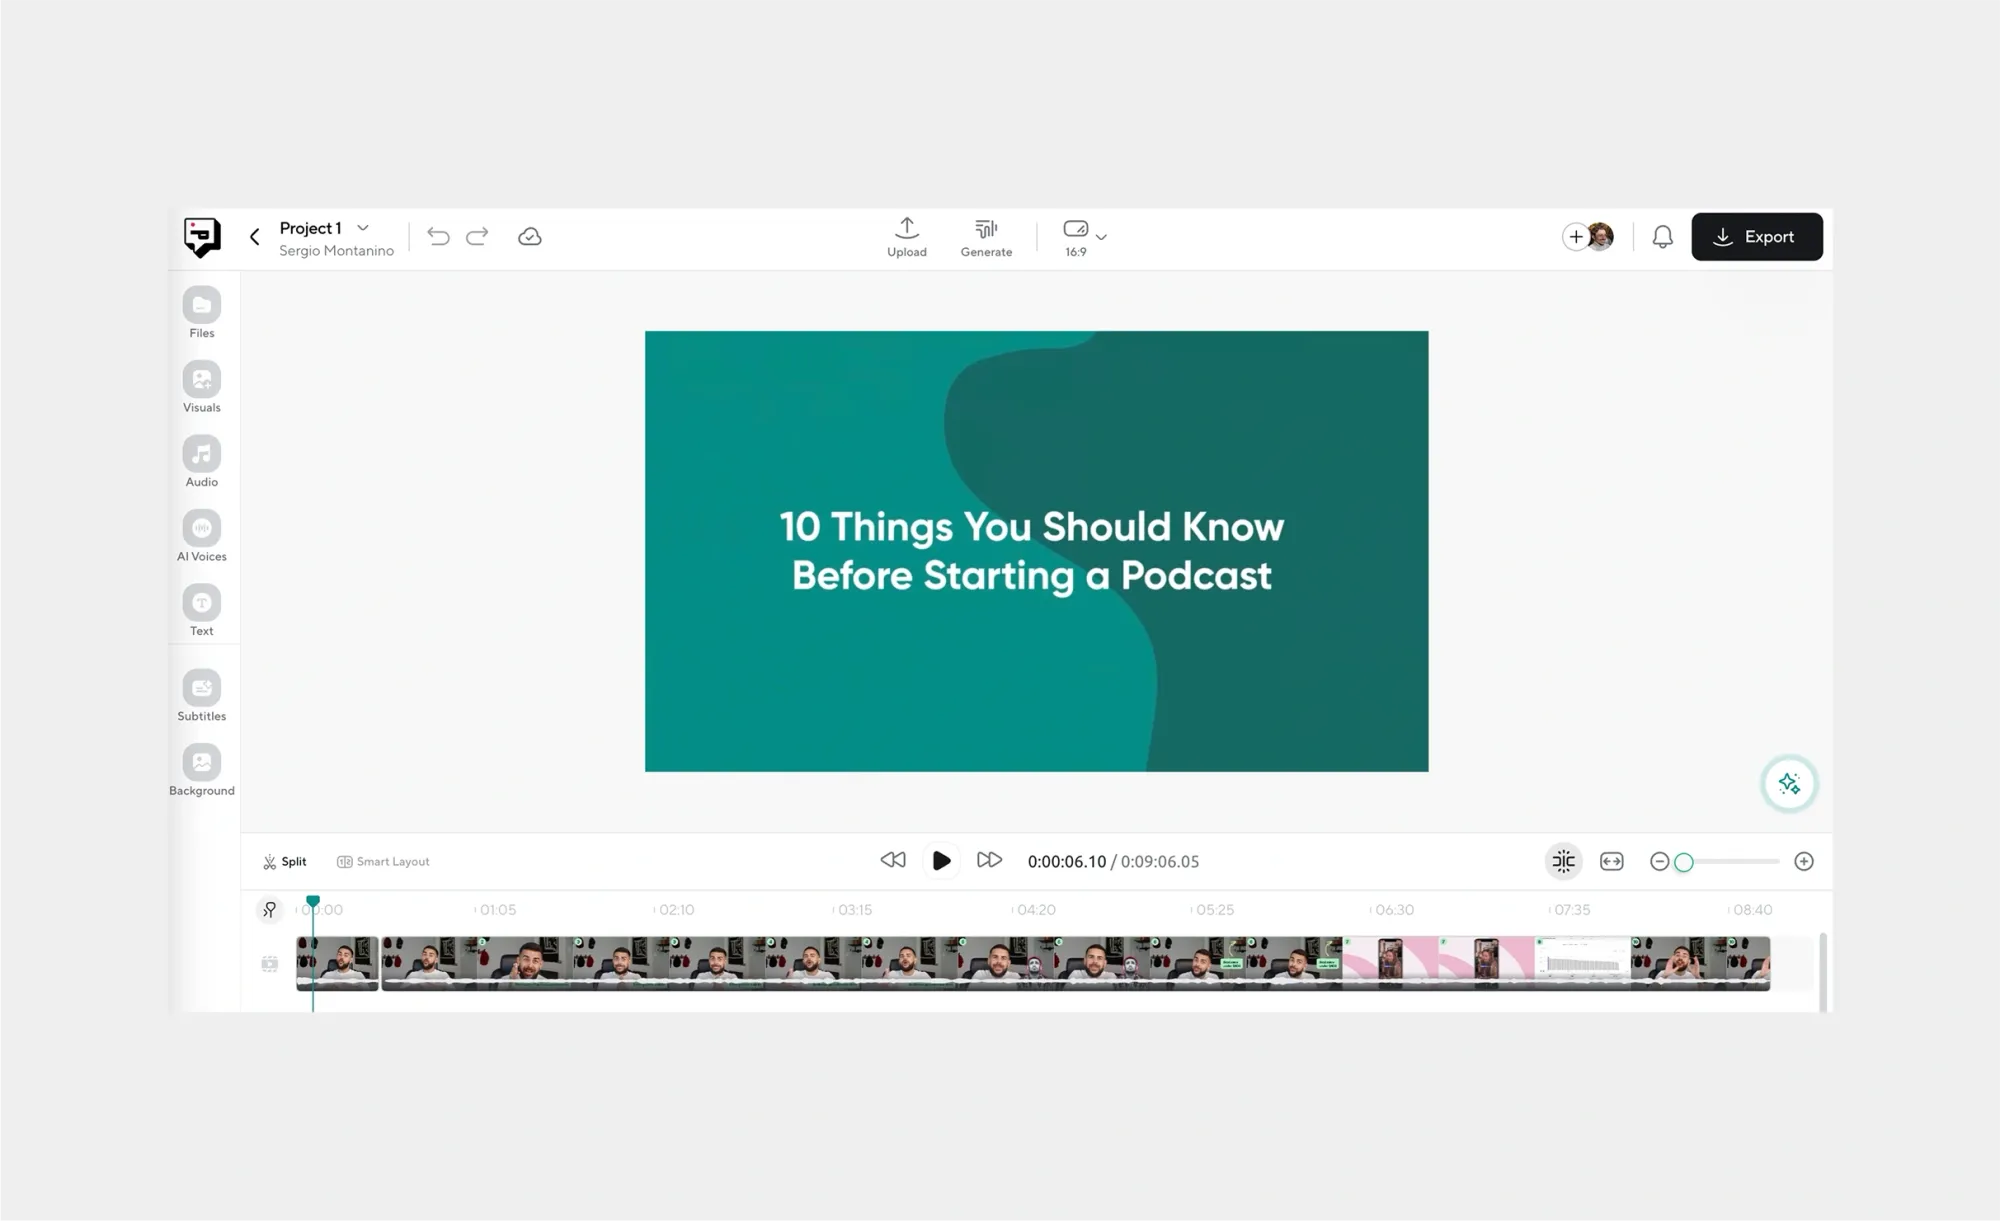
Fire up Podcastle's video editor and create a new project. This is where you'll dump all your raw footage and yes, it might look overwhelming at first. Don't worry about the order yet; just get everything uploaded into your project library.
Once your clips are loaded, start dragging them onto the timeline. Arrange them in the order that feels right for your story, but don't stress about perfection here. You'll be moving things around plenty.
2. Choose Your Aspect Ratio
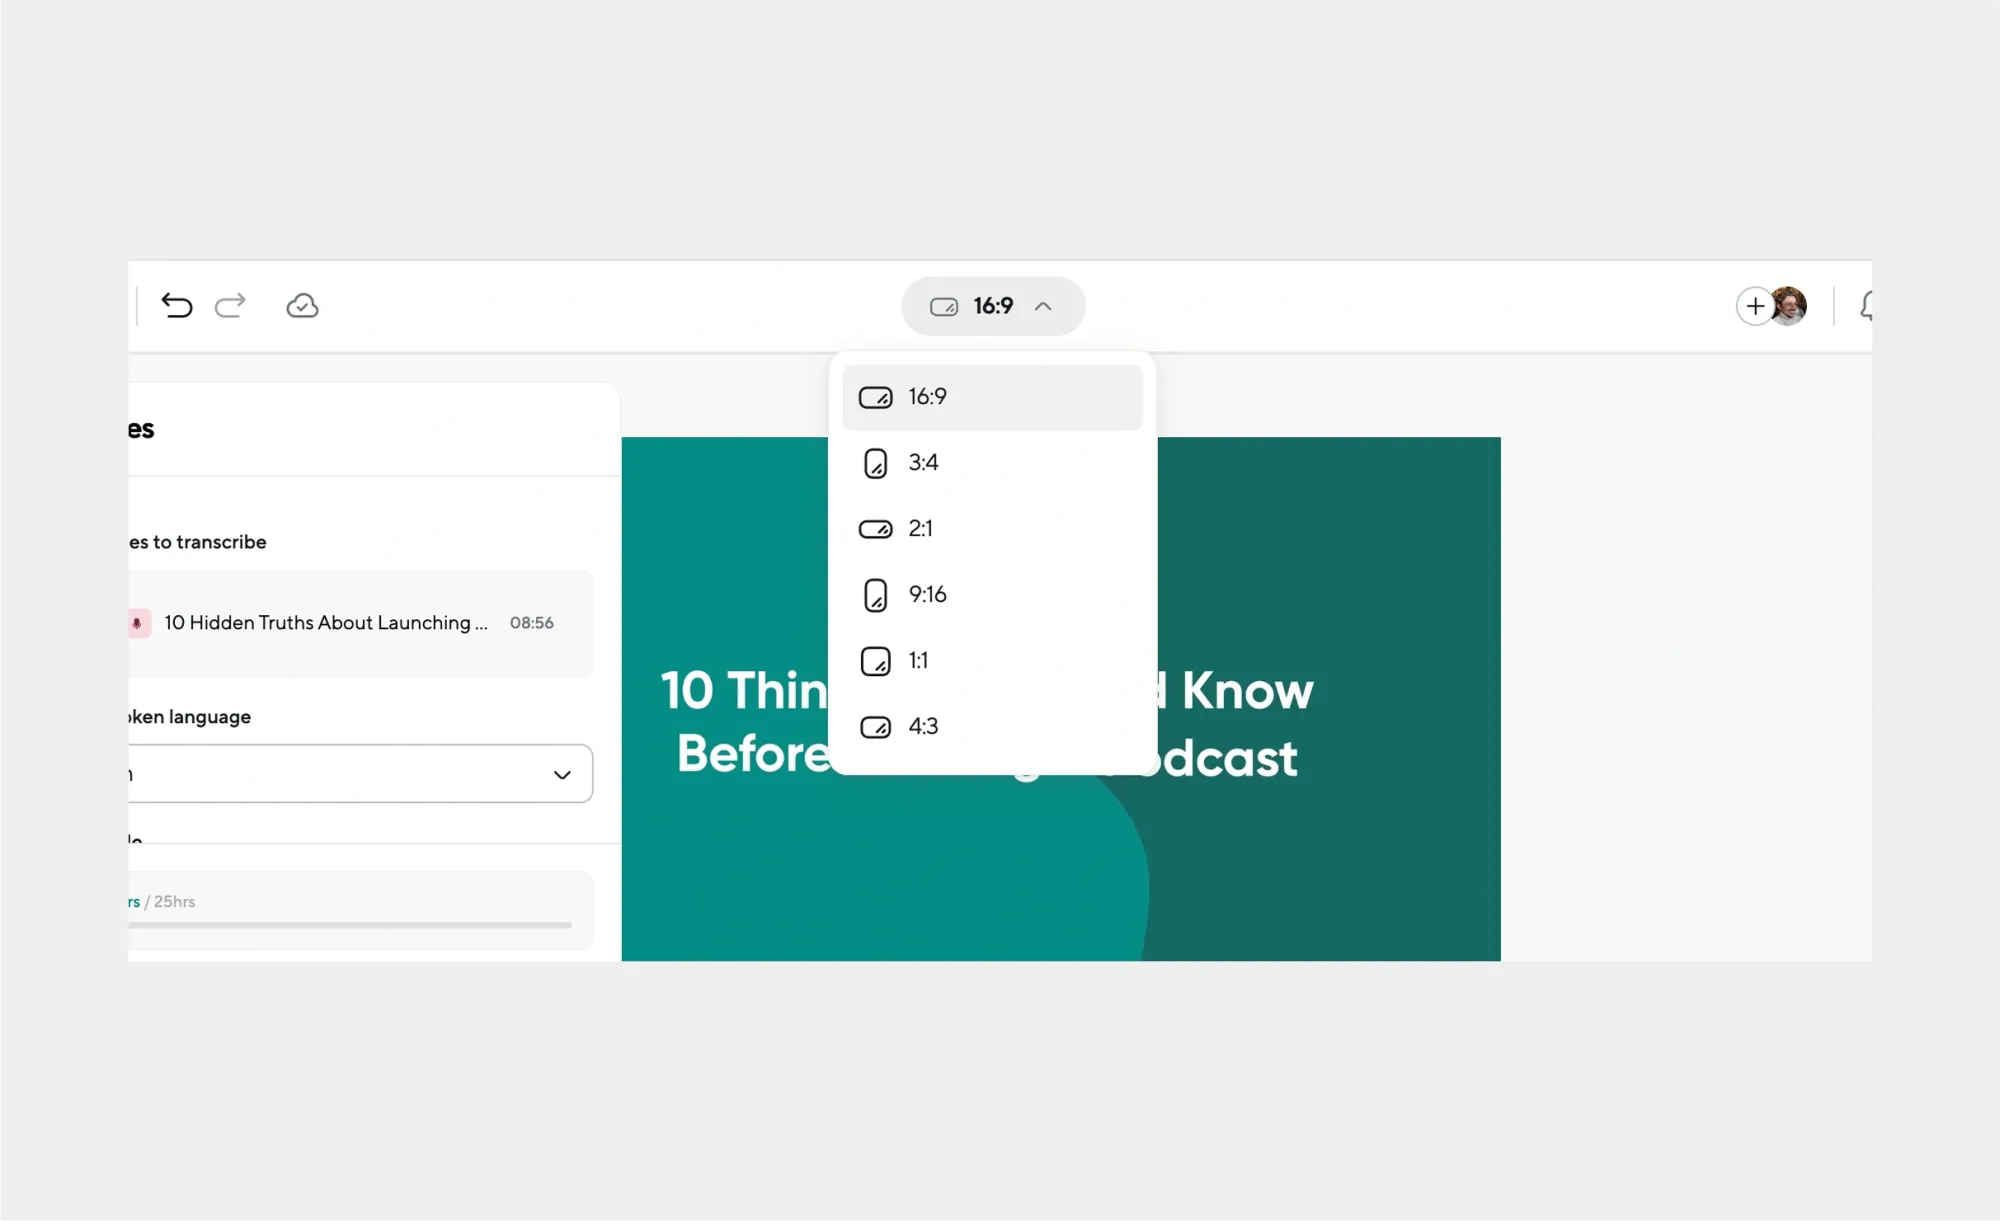
Now that your clips are organized, it's time to decide where this compilation will live. YouTube calls for 16:9 (landscape), TikTok and Instagram Stories work best in 9:16 (vertical), and Instagram feed posts often perform well in 1:1 (square).
The great thing about Podcastle is that you can adjust and change your aspect ratio right within the platform as you work. You can even create multiple versions for different platforms without starting over. Play around with the settings to see how your content looks in different formats.
3. Trim and Cut Your Footage
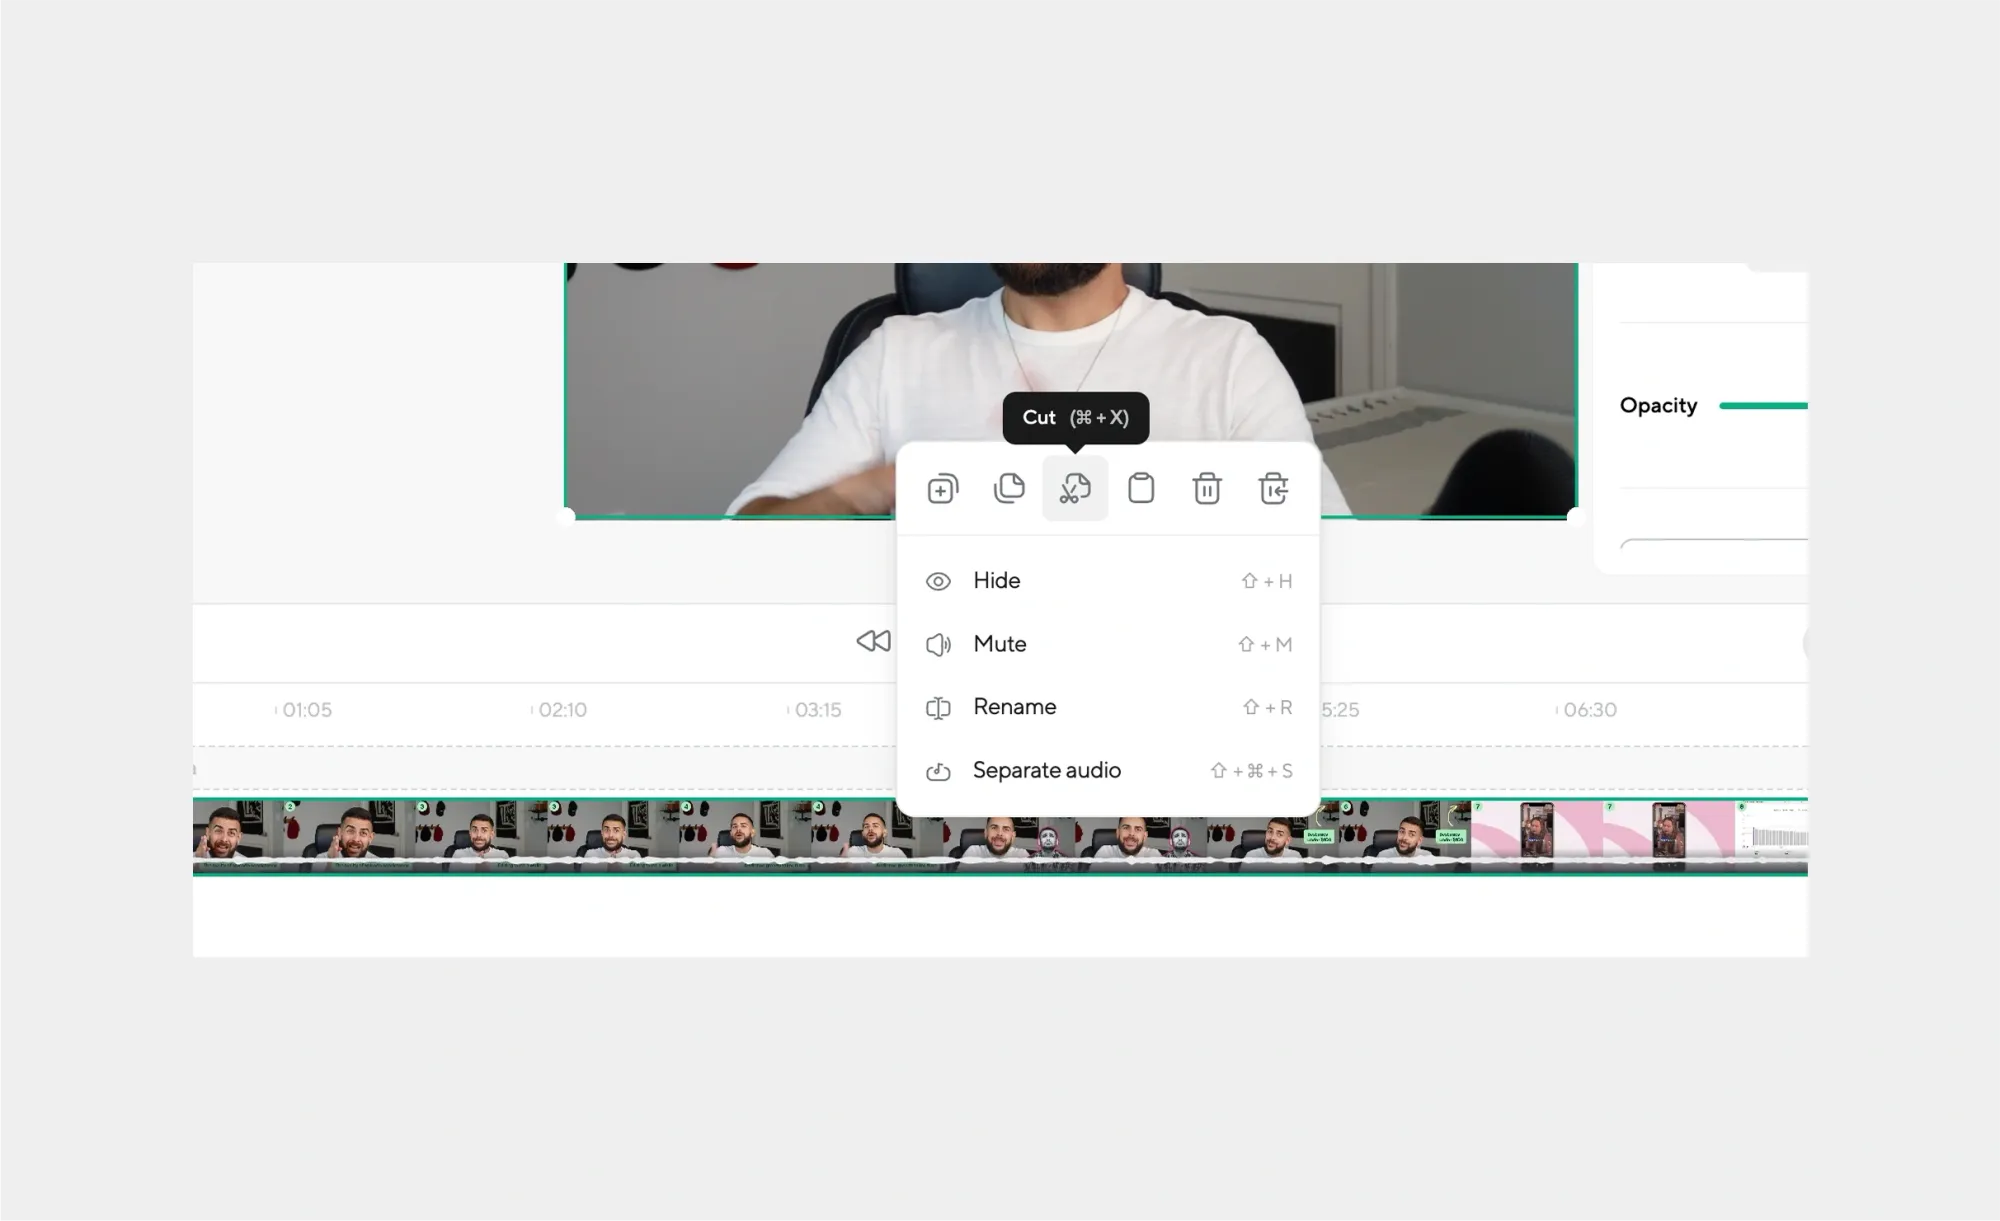
Here's where most people get stuck: they try to use everything. Don't. Your job isn't to preserve every second of footage, it's to find the moments that matter.
Start trimming aggressively. Cut out the awkward pauses, the "um"s, the parts where nothing's happening. The goal is pacing that keeps people engaged.
If a moment doesn't add energy, emotion, or information, it probably doesn't belong in your compilation. Be brutal; your audience will thank you for it.
4. Add Smooth Transitions
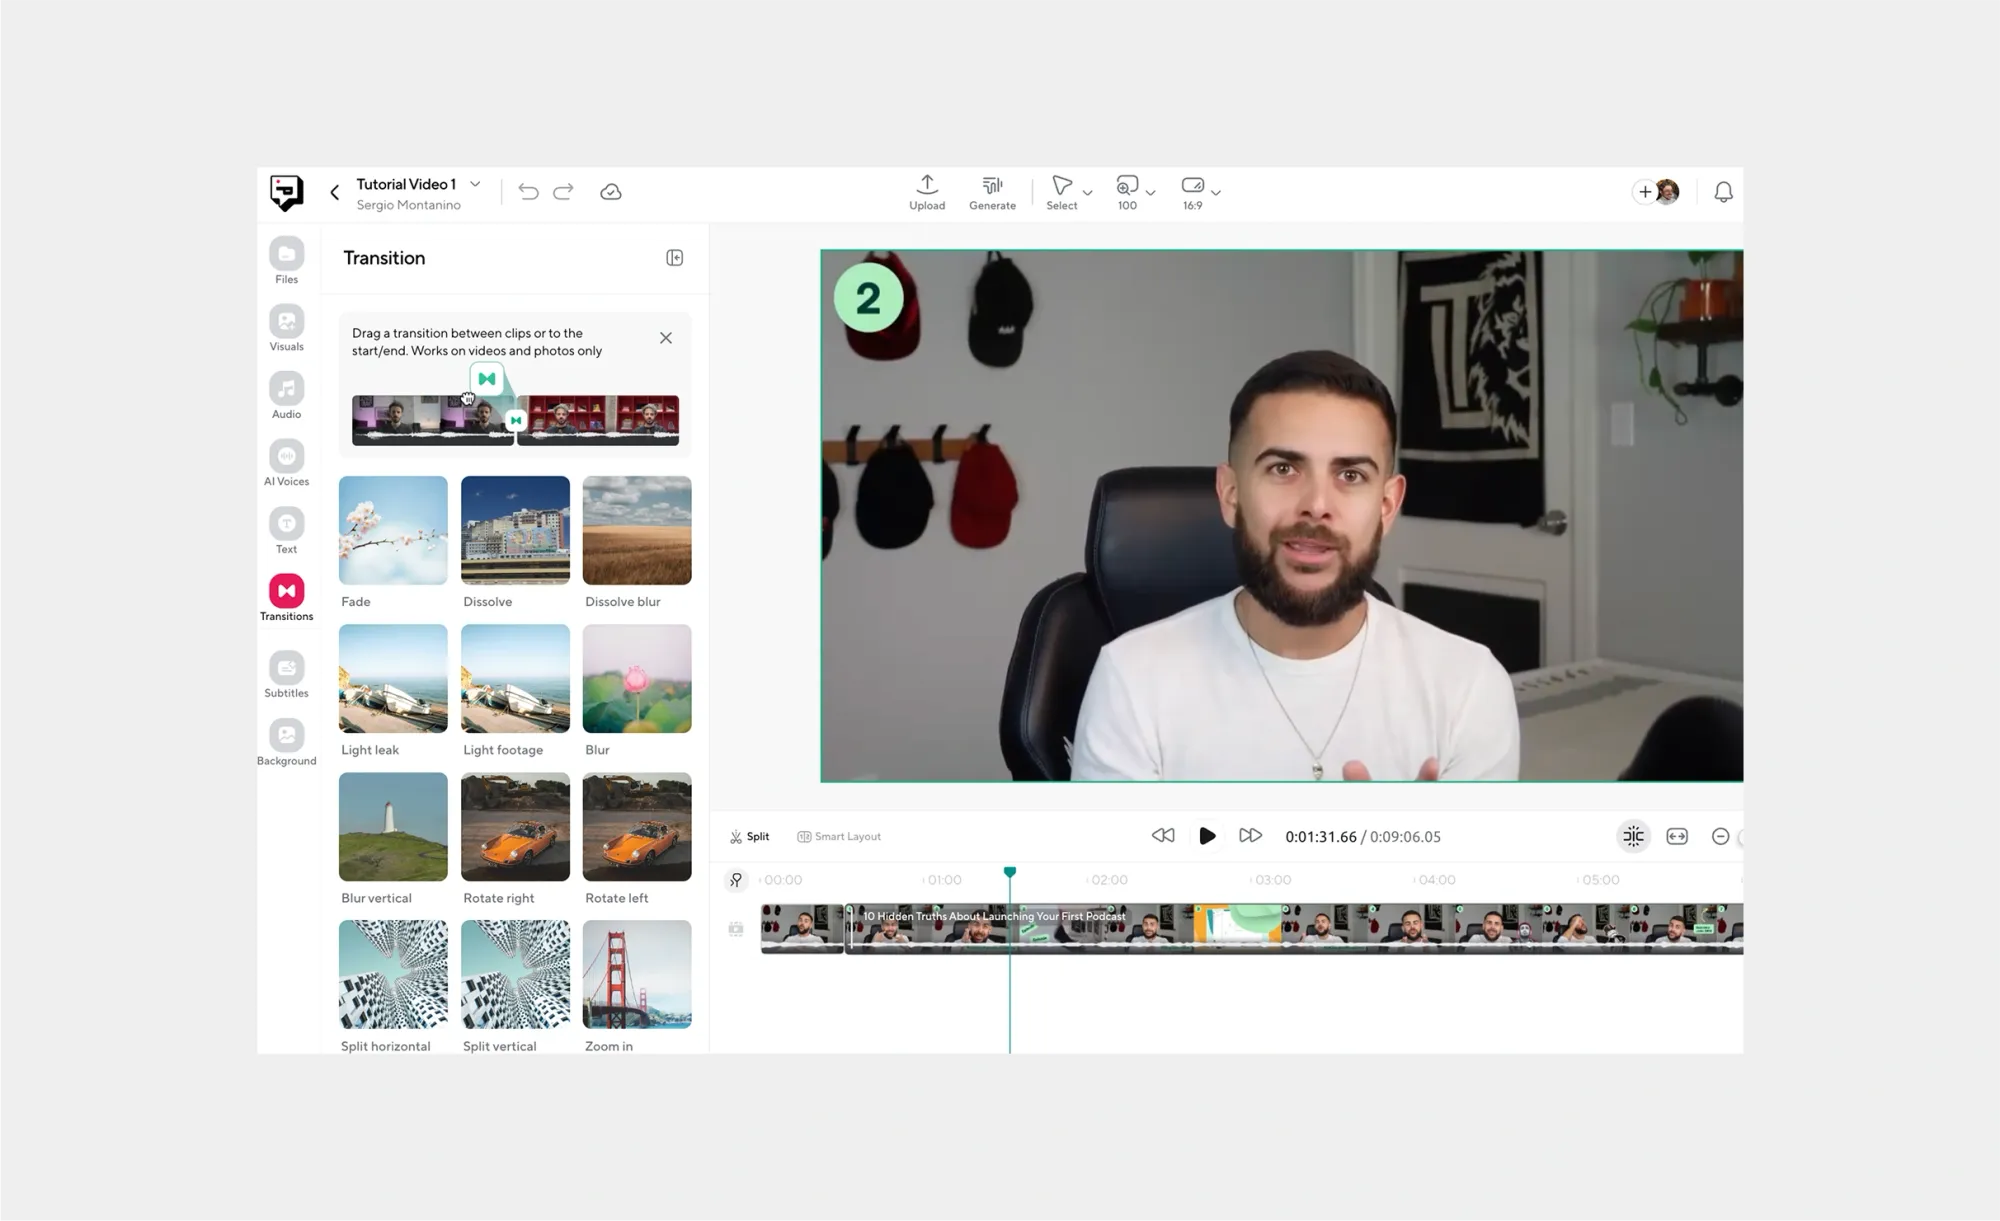
Jarring cuts between clips can kill the momentum you've built. This is where transitions become your friend, but use them thoughtfully. A simple cross-dissolve often works better than a flashy effect that draws attention to itself.
If you're going from something intense to something calm, a slower fade might help. If you're building energy, quicker cuts might work better. The transition should feel invisible, viewers should be focused on your content, not your editing choices.
5. Use AI to Enhance Your Video
This is where Podcastle really shines. Instead of spending hours manually adjusting audio levels between clips, let the AI handle it. The auto-leveling feature ensures your compilation doesn't have those annoying volume jumps that make people reach for the remote.
The noise reduction feature can save clips you might have otherwise thrown away. That great moment with background chatter? The AI can often clean it up enough to be usable. It's like having a sound engineer working alongside you.
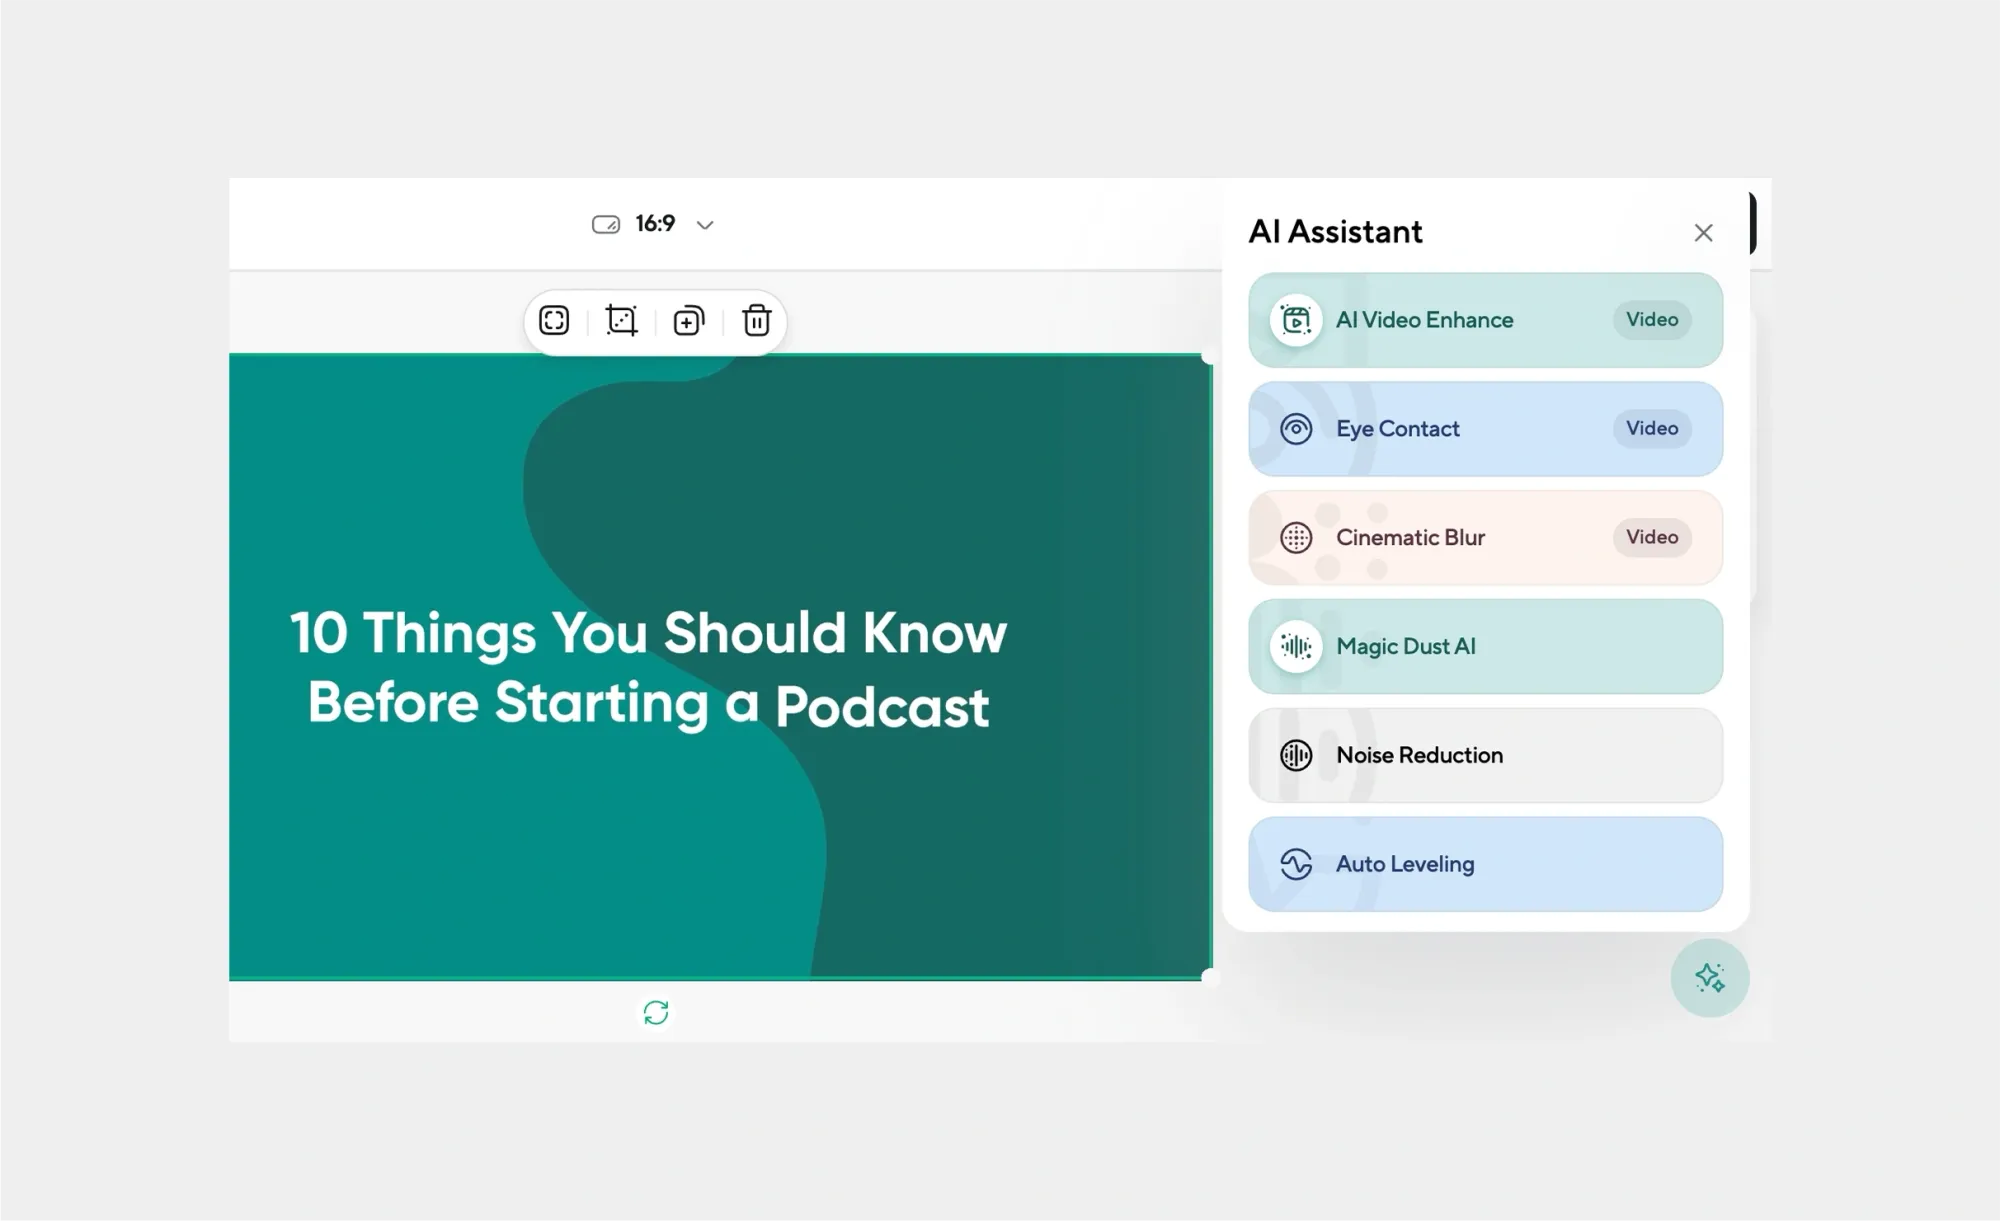
But Podcastle's AI goes beyond just audio. You can also use:
- Background Removal: Clean up messy backgrounds in your video clips.
- AI Video Enhance: Automatically improve video quality, sharpness, and clarity by removing grain and artifacts.
- Eye Contact: Fix looking-away moments if that’s what your videos require.
- Cinematic Blur: Add professional-looking depth with natural, professional camera-like blur.
- Magic Dust AI: Enhance overall video aesthetics with intelligent processing and achieve studio quality footage.
6. Add Music and Sounds Effects
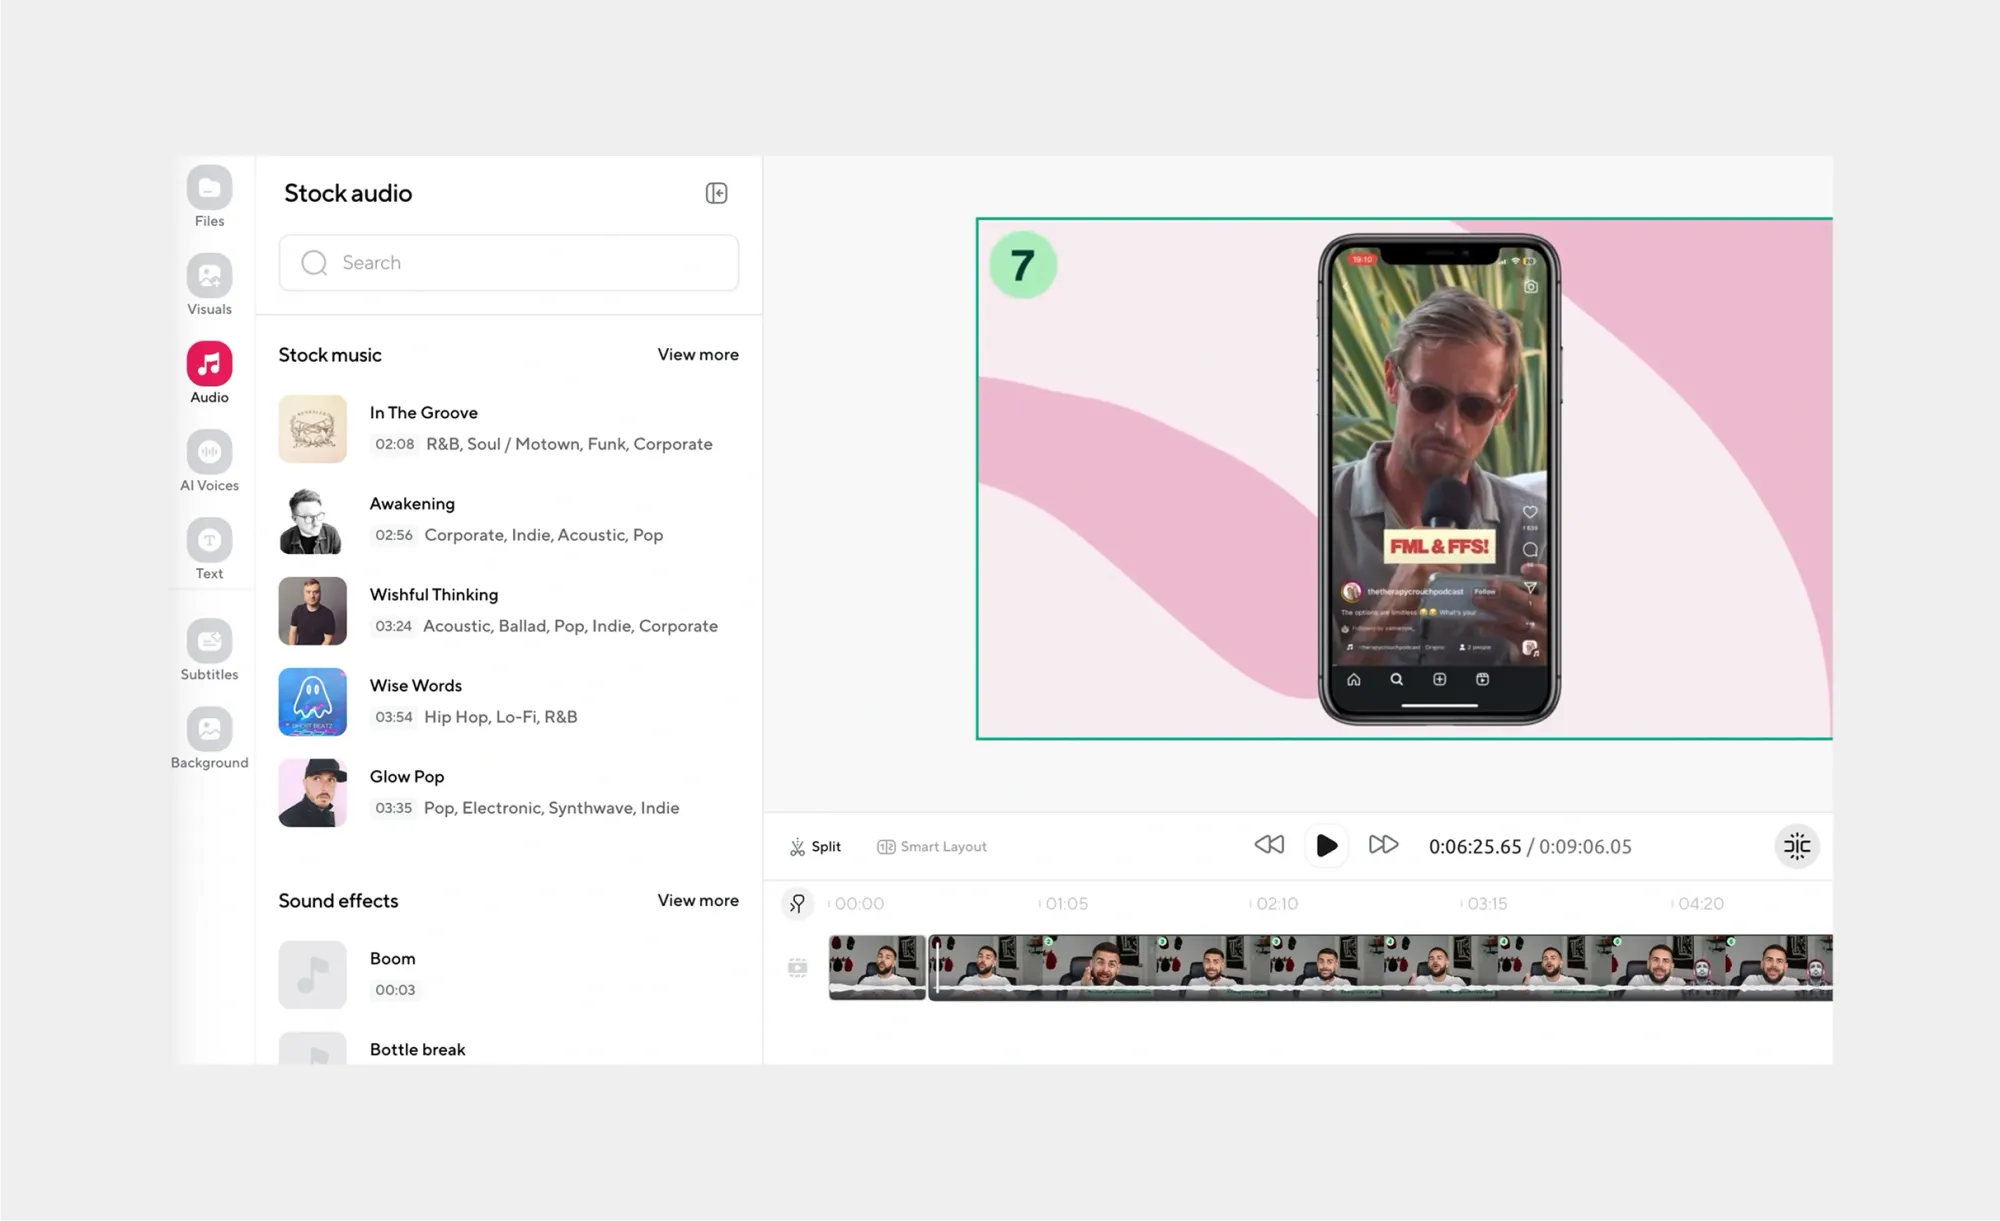
Music can make or break your compilation. The right track turns a collection of clips into an emotional experience. The wrong one makes everything feel disconnected.
Upload your chosen background music or select from Podcastle’s offering, and drop it onto the timeline. Now comes the tricky part: matching the energy of your music to the energy of your clips. You might need to adjust the timing of cuts to hit musical beats, or fade the music down during important dialogue.
And remember, if you're planning to share your compilation anywhere public, you'll need tracks you have the rights to use.
And here's an additional pro tip: add subtle sound effects to enhance key moments. A simple "whoosh" can make a visual transition feel more smooth, and a well-placed silence can make a moment hit harder.
7. Add Stock Videos, Images, or GIFs
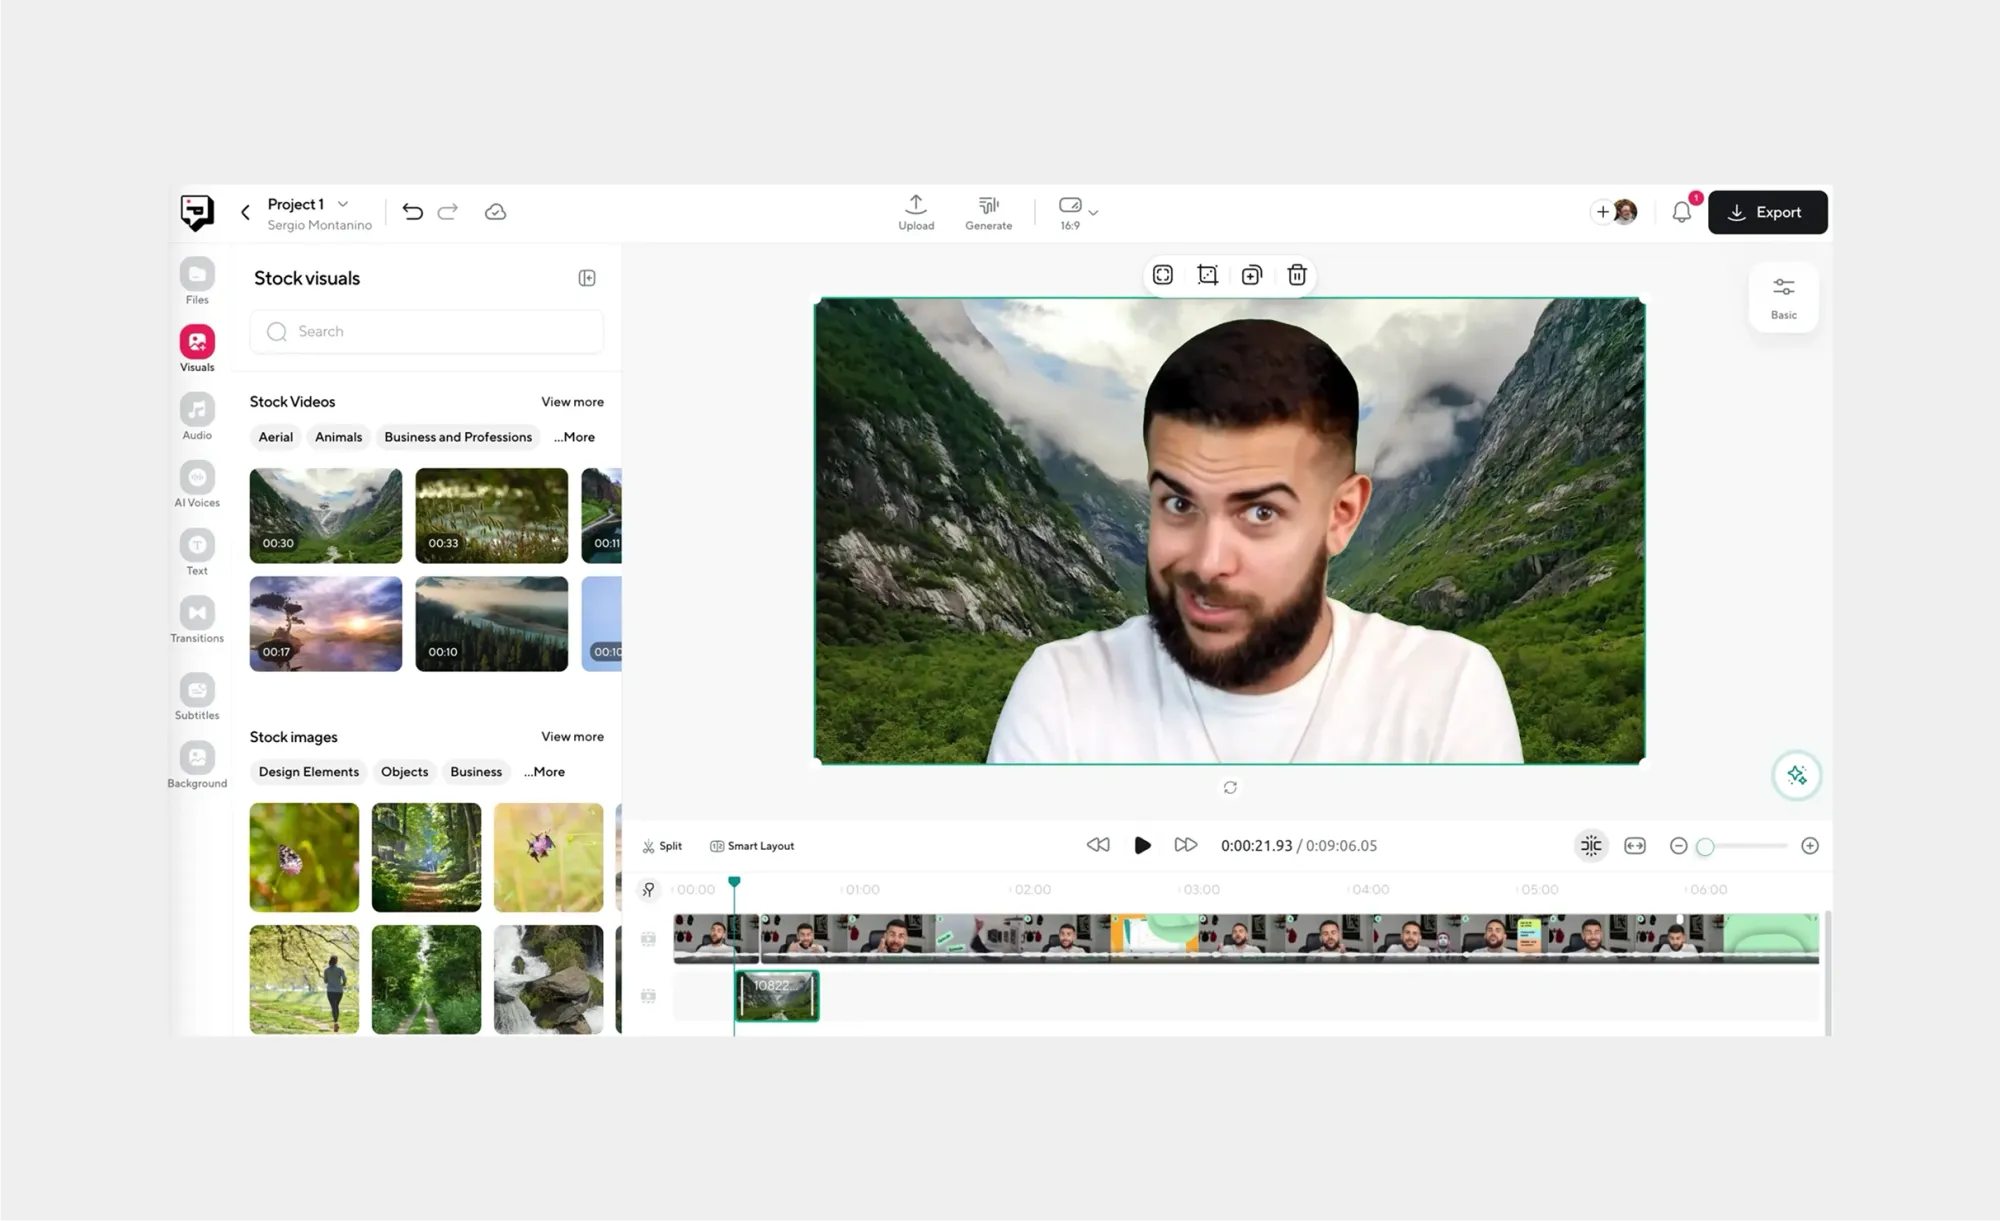
Sometimes your footage needs a little extra visual support. Maybe you have a gap between clips that feels awkward, or you want to add some visual interest to a section that's heavy on dialogue. Podcastle offers a library of copyright-free visuals, images, and animations that can solve these problems.
Use them for transitions, background elements, or to illustrate points your narration is making. The key is using them purposefully, not just because they're available.
8. Add Subtitles
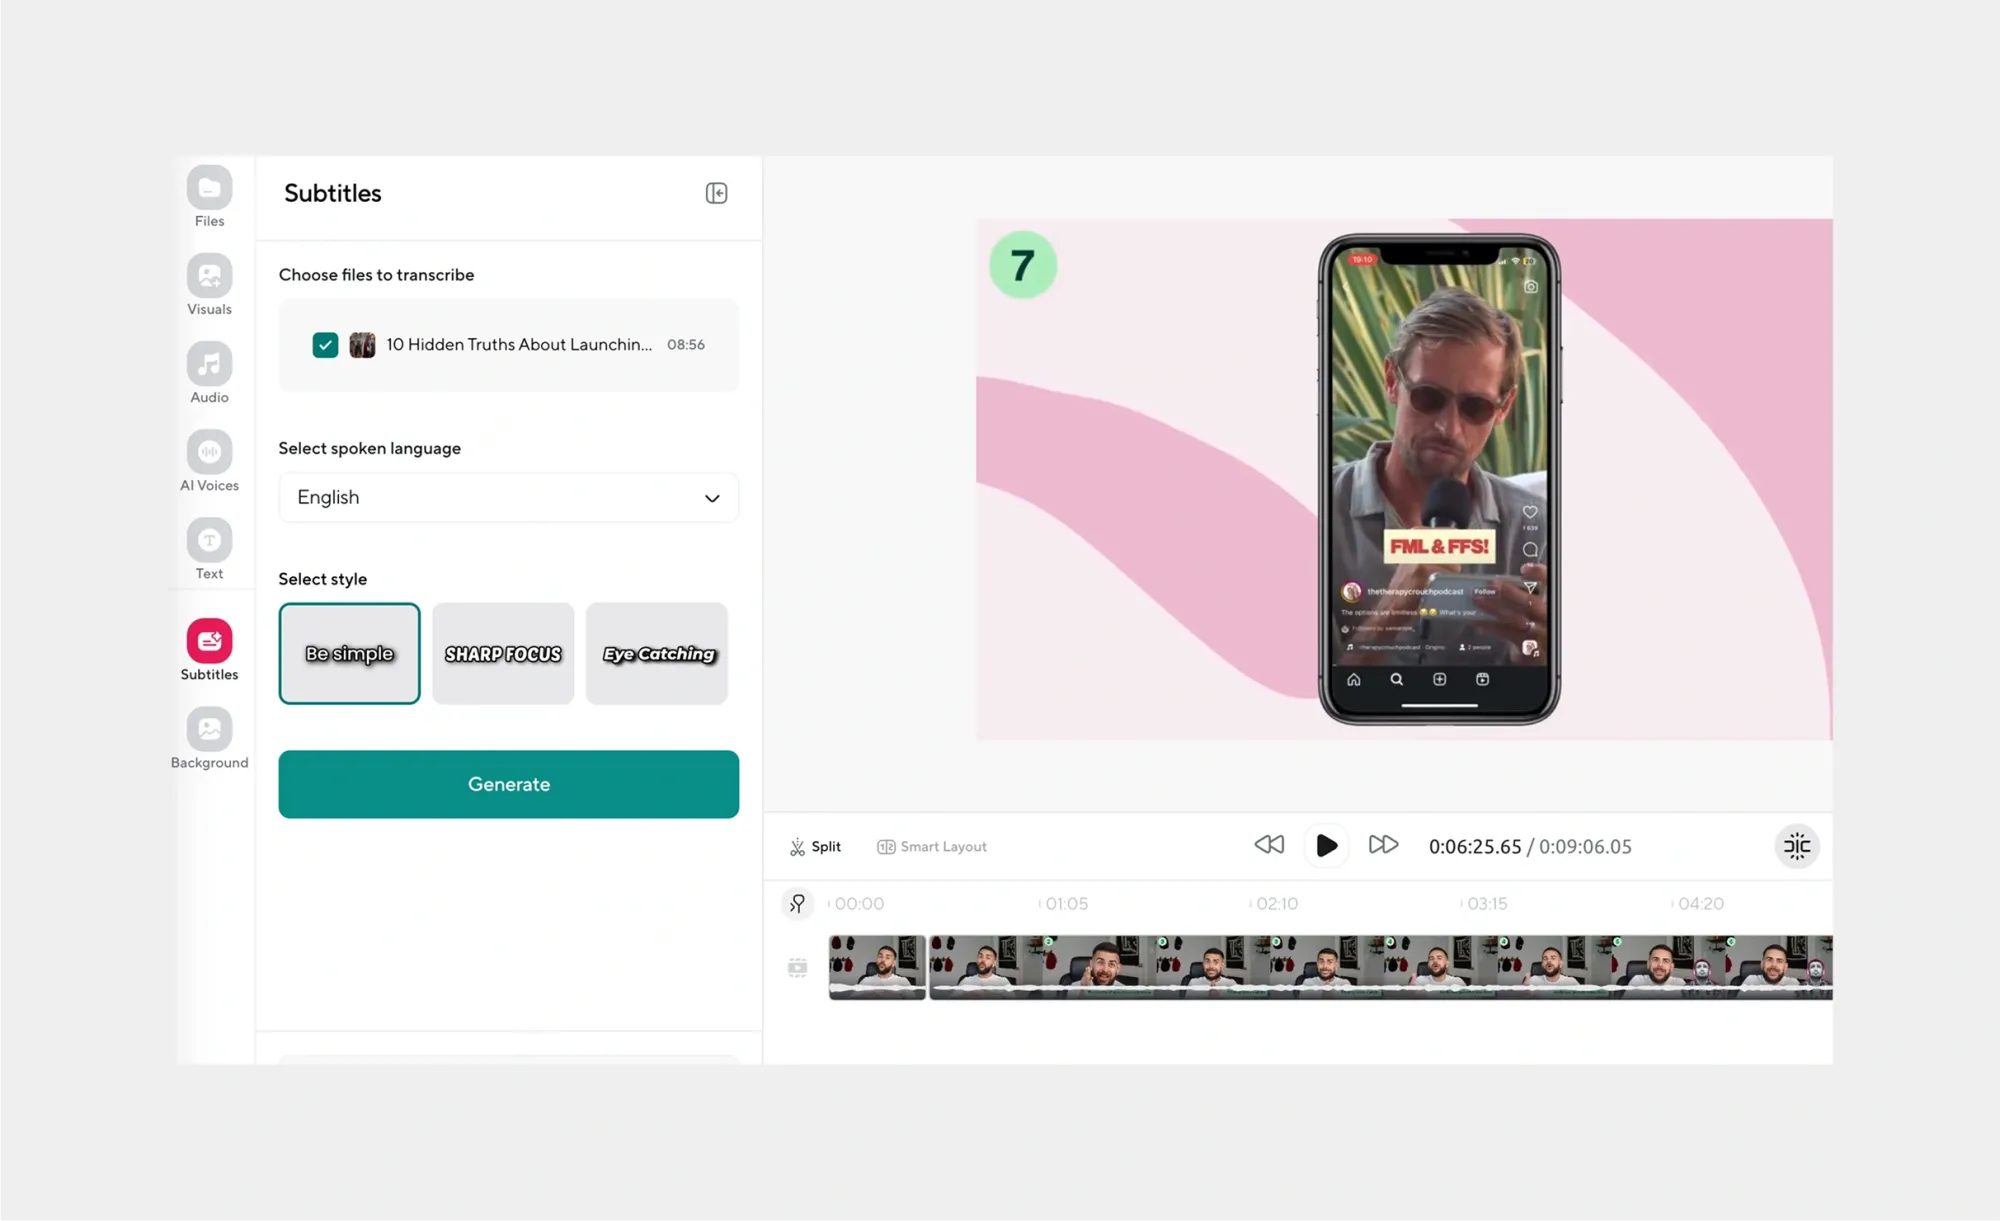
If your compilation video includes narration or spoken content, not just music, then subtitles are a must. Most people watch videos on social media with the sound off, especially in public spaces. Adding subtitles means your compilation can grab attention and tell its story even without audio.
Podcastle makes subtitle creation straightforward. You can auto-generate them from your audio and then edit for accuracy, or create them manually for precise control. Either way, make sure they're timed well and easy to read against your video background.
9. Add AI Voiceover
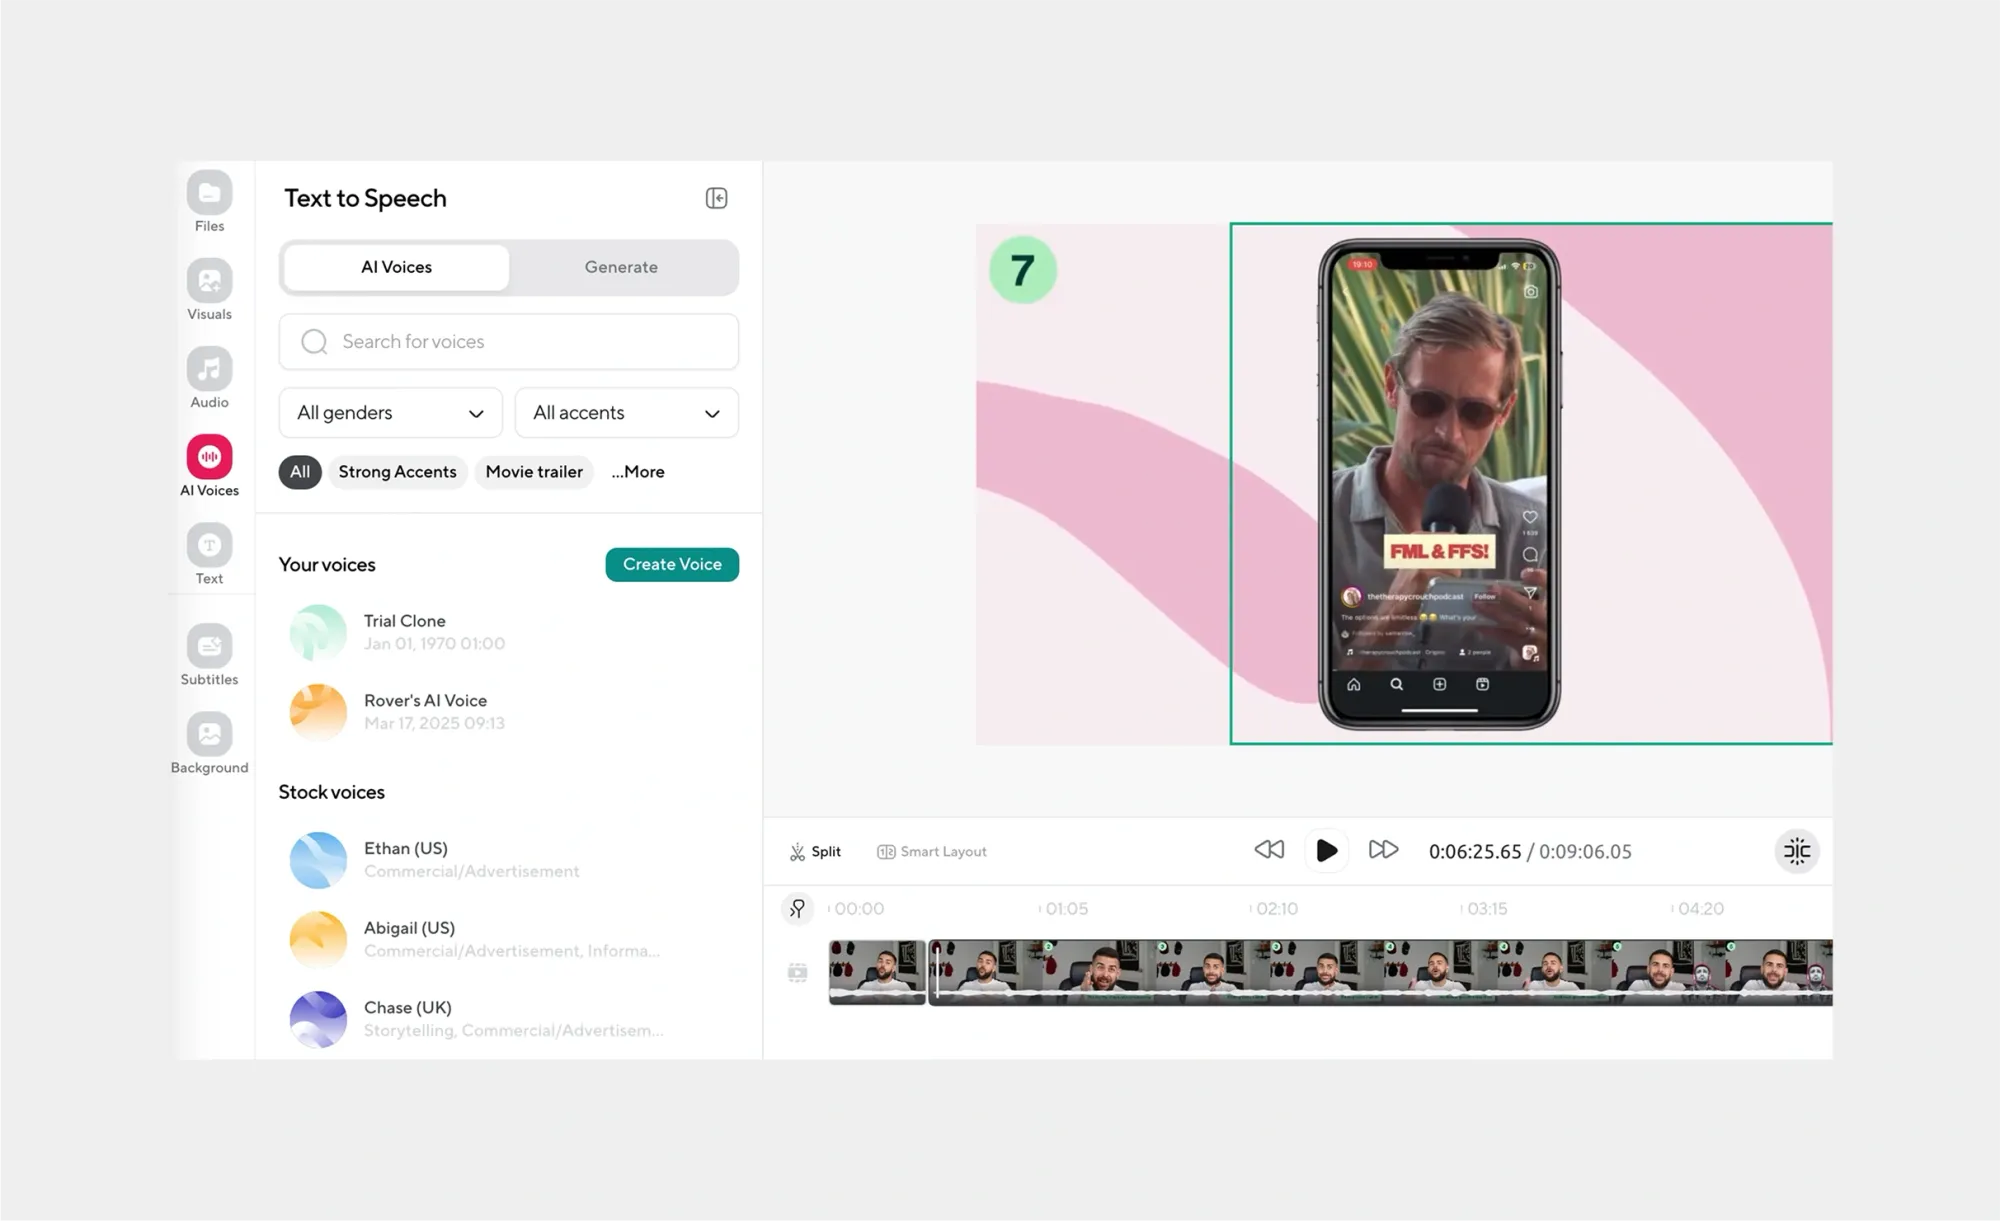
Sometimes the best narration comes from not narrating at all, at least not with your own voice. Podcastle's AI voiceover feature lets you type out exactly what you want to say and have it spoken by a professional-sounding voice that never stumbles, never needs a retake, and never sounds tired.
Simply write your script, choose a voice that matches your compilation's mood, and let the AI handle the delivery.
10. Export and Share Your Compilation
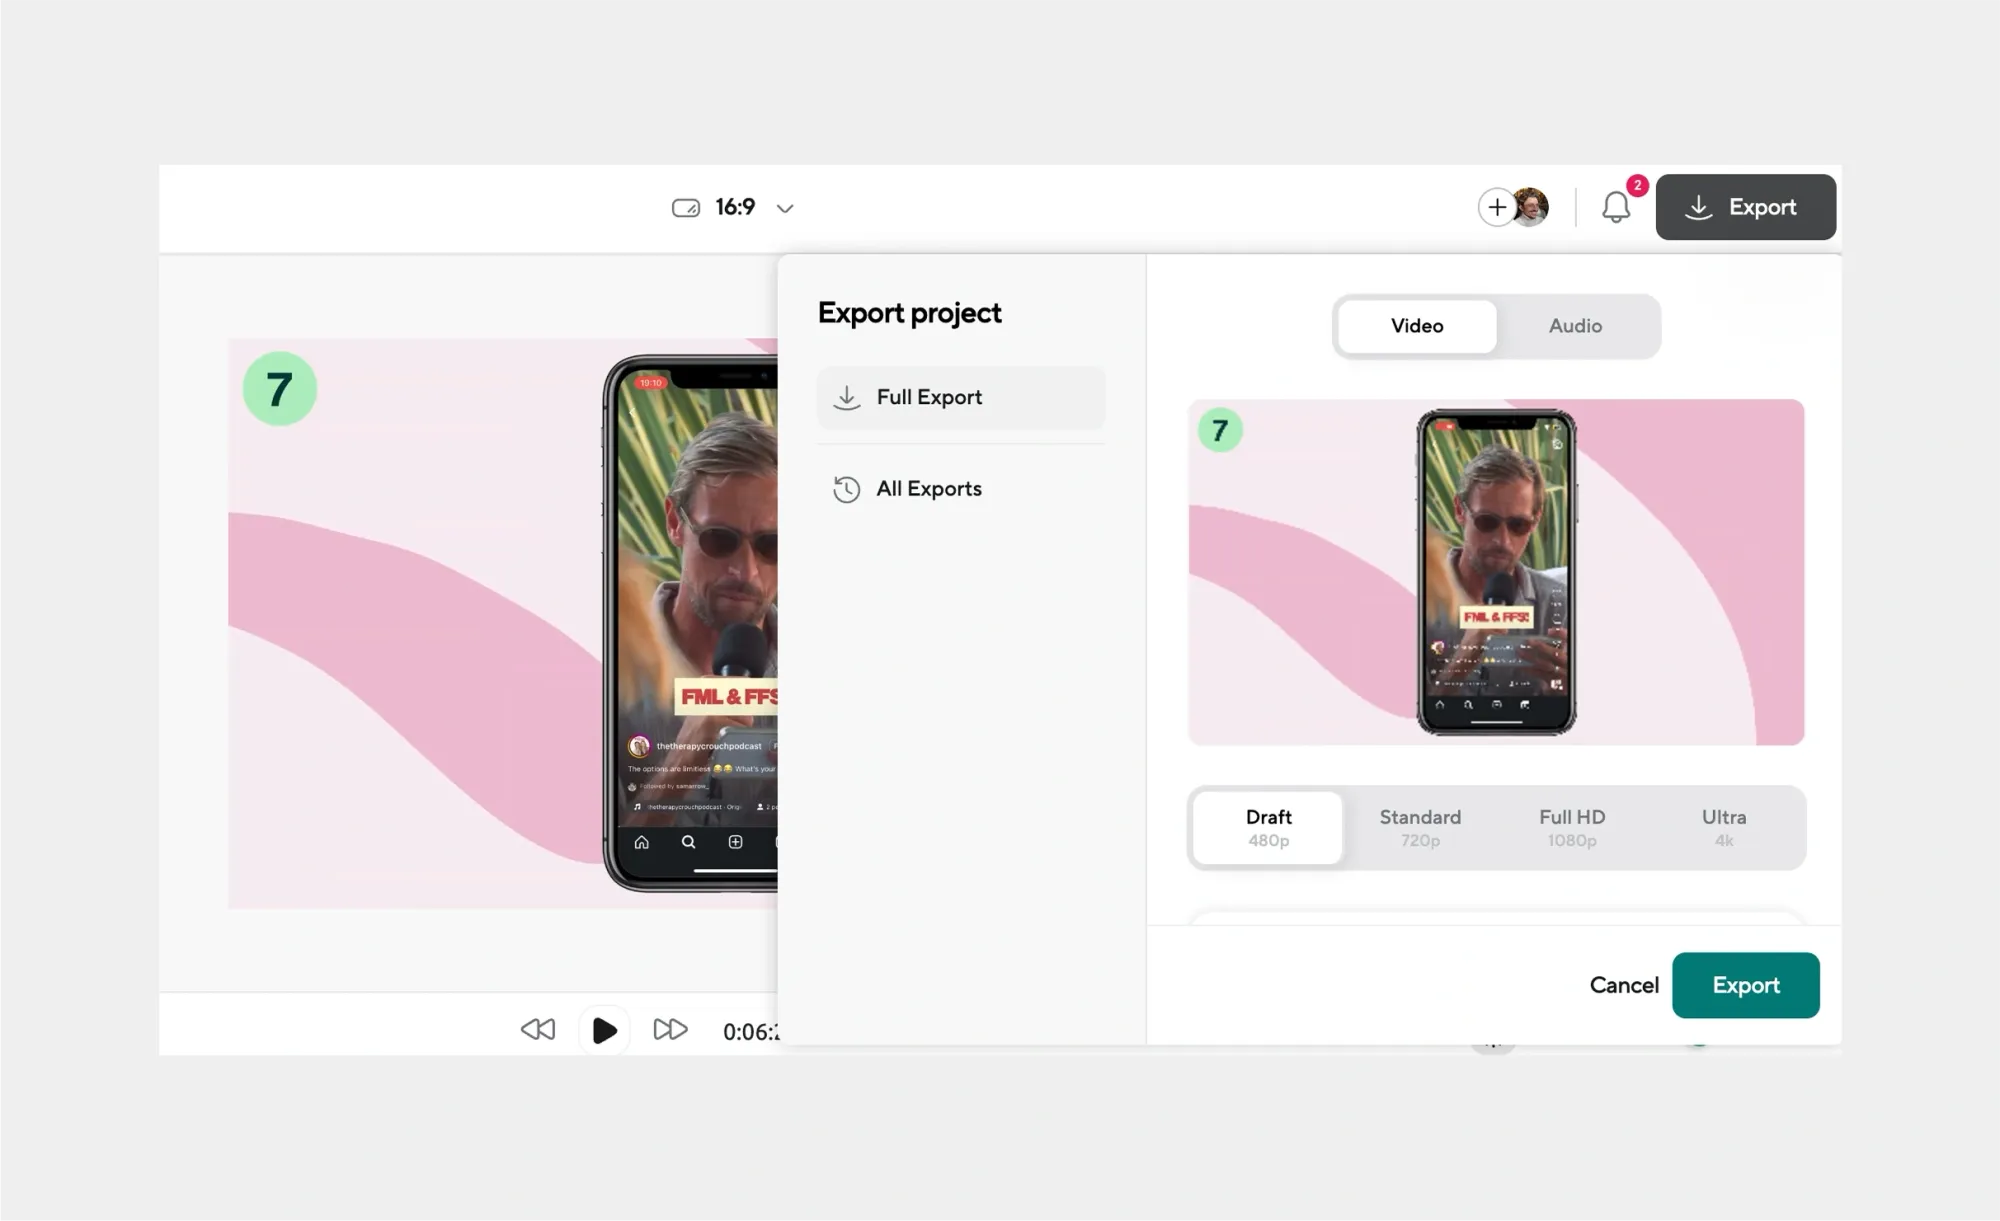
Export in the highest quality you can manage, you can always compress later for different platforms, but you can't add quality that wasn't there to begin with. Then comes the fun part: sharing it.
Different platforms have different optimal formats and lengths, so you might need to create multiple versions. A three-minute compilation might work great on YouTube but needs to be cut down for Instagram or TikTok. Plan for this from the beginning if you know you'll be sharing across multiple platforms.
Video Editing Tips for Compilation Videos
The difference between a compilation that gets shared and one that gets skipped isn't about expensive equipment or years of experience. It's about understanding a few key principles that turn scattered moments into something magnetic.
1. The Golden Rule: Start Like You Mean It
Your first few seconds are everything. This is when viewers decide whether to stick around or swipe away. Don't ease into your compilation with a slow fade or gentle introduction. Hit them with your strongest moment, your funniest clip, or your most visually striking shot.
2. Rhythm is Your Secret Weapon
Great compilations know when to speed up and when to slow down. The easiest way to find this rhythm is to let your music be your guide. Don't just lay audio underneath your video, let it drive your editing decisions. Cut on the beat, switch clips with the tempo changes, and use musical pauses as moments for your most impactful shots. When your cuts sync with the music, viewers feel it even if they can't put their finger on why your video feels more professional.
3. Less is More (Especially with Effects)
Every transition doesn't need to be a star wipe. Every text overlay doesn't need to bounce and sparkle. The most powerful edits are often invisible, cuts that feel so natural you don't notice them happening. Your content should be the star, not your editing skills. When in doubt, choose the simpler option. A clean cut usually beats a flashy transition, and readable text beats decorative fonts every time.
4. The Mobile-First Mindset
Here's the reality: most people will watch your compilation on their phone, probably while doing something else. Edit with this in mind. Use larger text that's readable on a small screen. Choose shots that work well in vertical format. Make sure your most important visual elements aren't happening in the corners where they might get cut off.
5. End with a Purpose
Your last clip should feel like a conclusion, not just the moment you ran out of footage. Be it the funniest moment, the most meaningful one, or something that brings the whole story full circle, give people a reason to feel satisfied when your compilation ends.
6. The 24-Hour Test
Before you publish, let your compilation sit for a day. Come back to it with fresh eyes and ask yourself: would I watch this if someone else made it? Does it tell the story I wanted to tell? Is there anything that feels unnecessary or anything important that's missing? Sometimes the best edit is the one you don't make, and sometimes it's the one you almost forgot to make.
Create Compilation Videos with Podcastle
Making a compilation video is a bit like storytelling with puzzle pieces. You’re taking individual moments, some raw, some random, and crafting something cohesive, emotional, or entertaining out of them. The process can be surprisingly rewarding, especially when you see the final cut click together.
With tools like Podcastle, the tech side becomes less intimidating. You’re free to experiment, tweak, and shape your idea into something people actually want to watch. And as you keep creating, you’ll find your own rhythm and voice.
So dig into your camera roll, revisit those dusty folders, or start recording new moments. Your first compilation might not be perfect. But it will be yours. And that’s more than enough to get started.