When you’re editing audio, splitting is usually the first thing people think of. It’s one of the most basic edits you can make, and it’s also one of the most useful.
You might need to trim out filler words, remove background noise, or maybe just rearrange the structure of what you recorded so it flows better.
The problem is that a lot of editing tools make the process feel more technical than it needs to be, like you have to already know what you’re doing just to do something simple, and that can get in the way of actually sitting down and finishing your project.
What you want, more than anything, is to be able to look at your audio, find the spot that needs fixing, and make the cut without having to second guess everything.
Podcastle makes that part free, and easy enough that you can just focus on the actual content instead of fumbling through settings or trying to remember how you did it last time.
Here’s how to do it.
How to Split Audio with Podcastle's Online Audio Editor
You can use our free online audio editor to split your recording into as many separate waveforms as you need, then drag each one to adjust its length or cut out the parts you don’t want. Here’s how to do it step by step.
Step 1: Open the editor and upload your audio

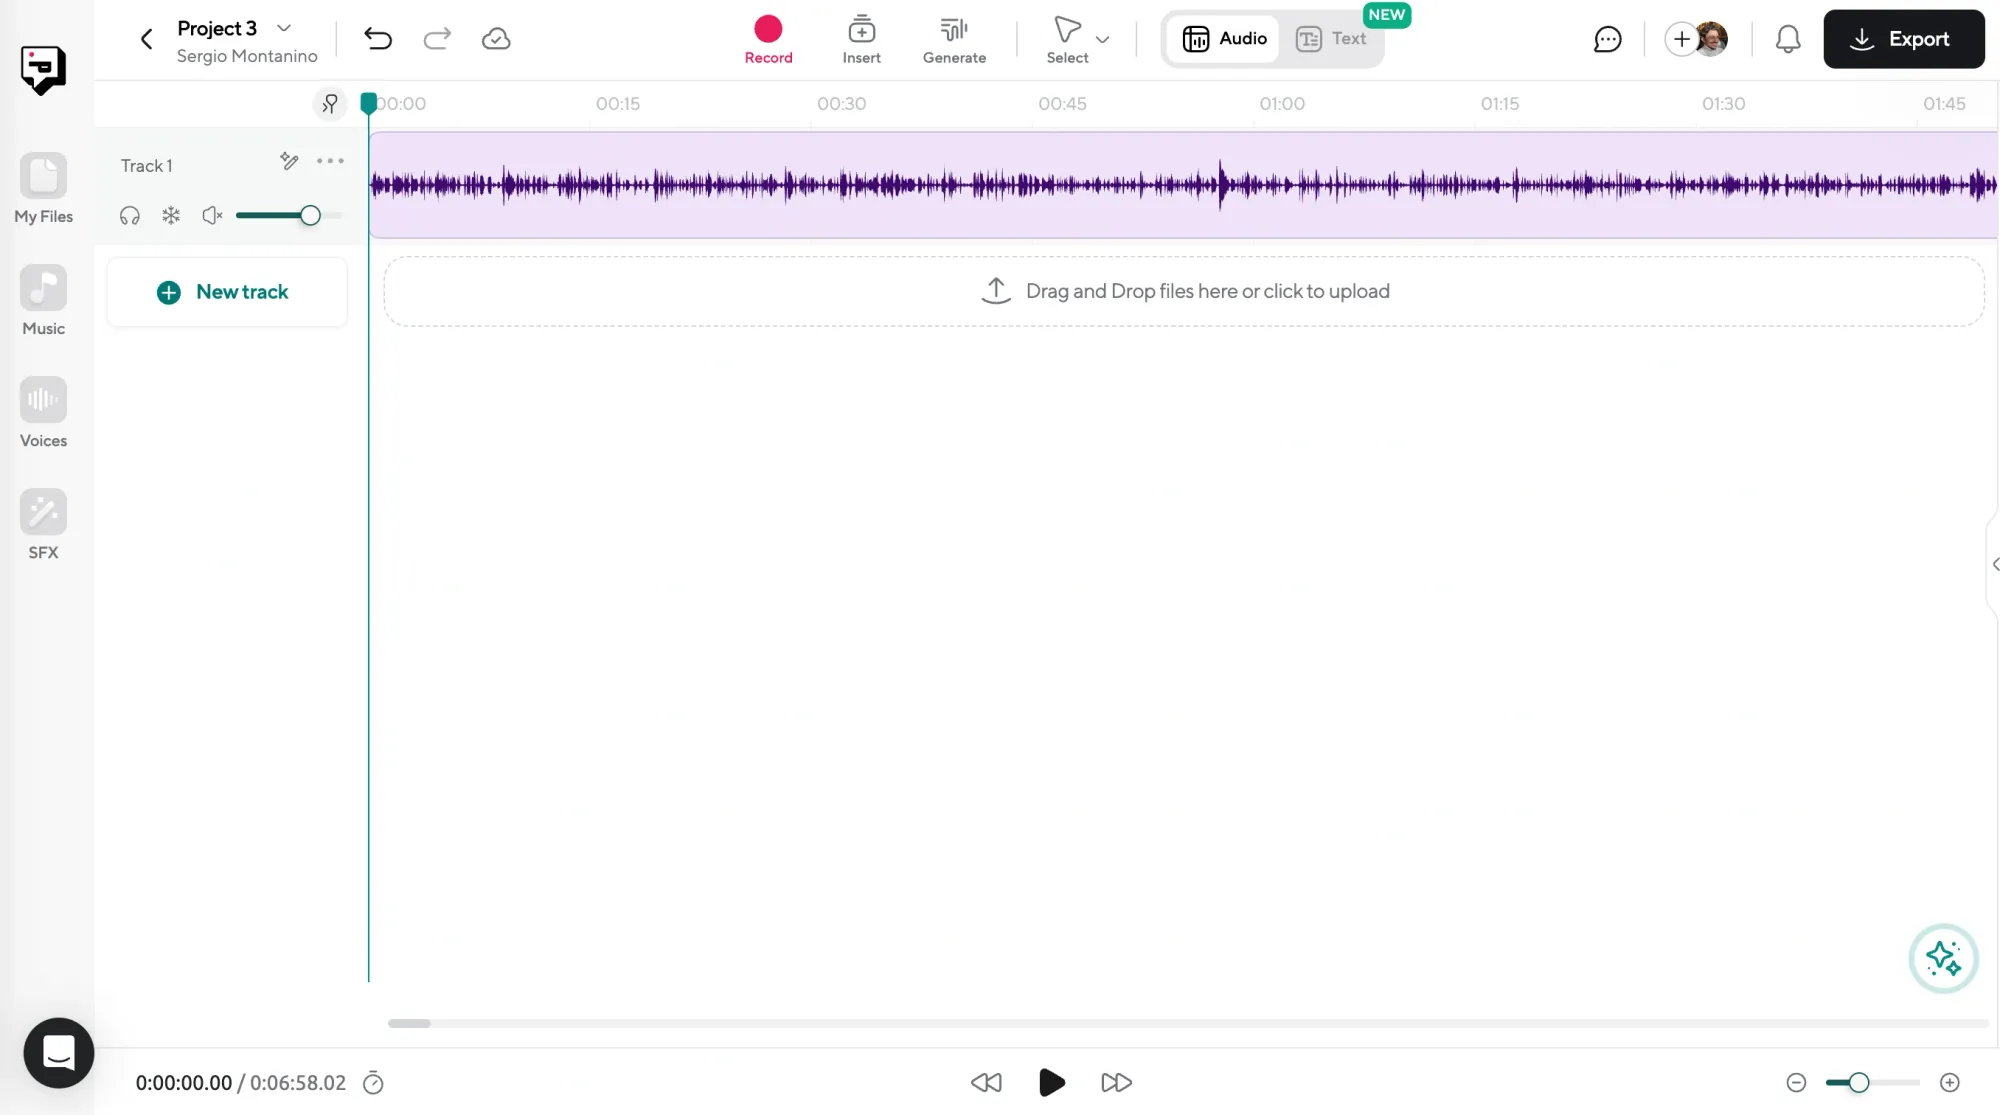
Start by going to Podcastle and opening a new project. Once you’re inside the audio editor, you’ll see a big empty timeline. That’s where your waveform is going to appear once you upload your recording. You can either drag your audio file straight into the timeline or click to upload it from your computer.
After a few seconds, you’ll see the waveform show up across the screen, and this is where you’ll do all your editing.
Step 2: Right click your audio file (or press select), and “Split”

Once your audio is on the timeline, press play and start listening back to your recording. When you find the spot you want to cut (maybe someone trailed off, or you lost your train of thought and had to restart) pause the audio and move the playhead to the exact place where the cut should happen. Right click, and select “Split.” That will divide your clip into two pieces. You can then drag either side to trim it, or move the segments around if you’re restructuring things.
Step 3: Use the waveform to guide your edits
In any waveform, you have some information to guide your editing choices. Larger spikes usually mean louder or more intense moments, while flat lines usually mean silence or very quiet sections. You can zoom in for more precision and use the waveform to help you find the exact start and end points you want to cut. This kind of editing is all visual, so you’re not relying on guesswork. You’re seeing the shape of your voice and making decisions based on that.
Step 4: Make any other AI-powered edits

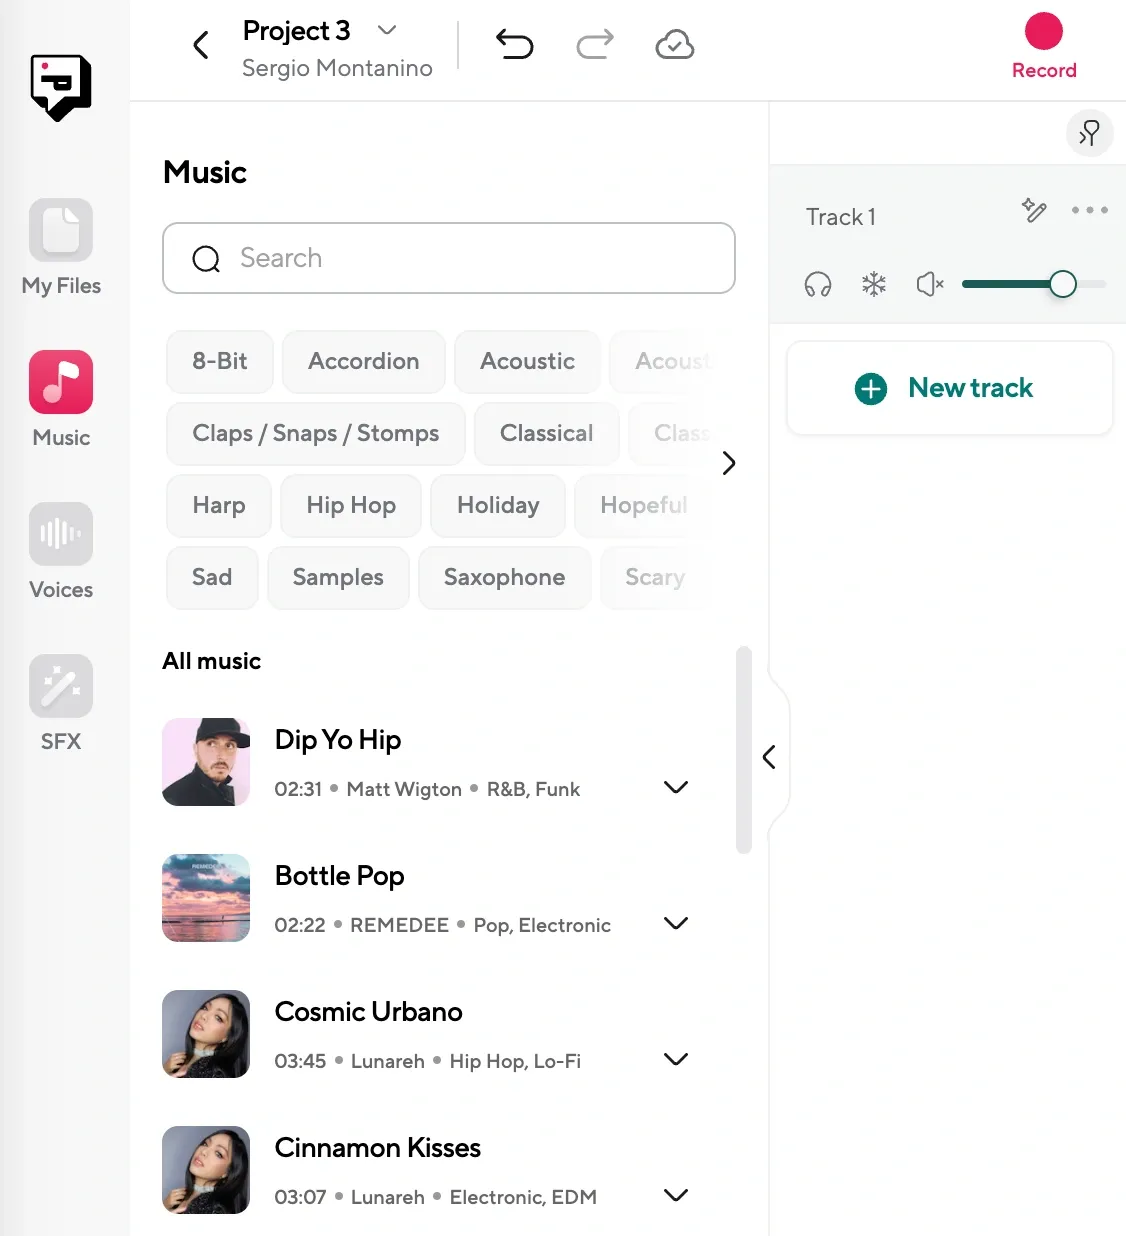
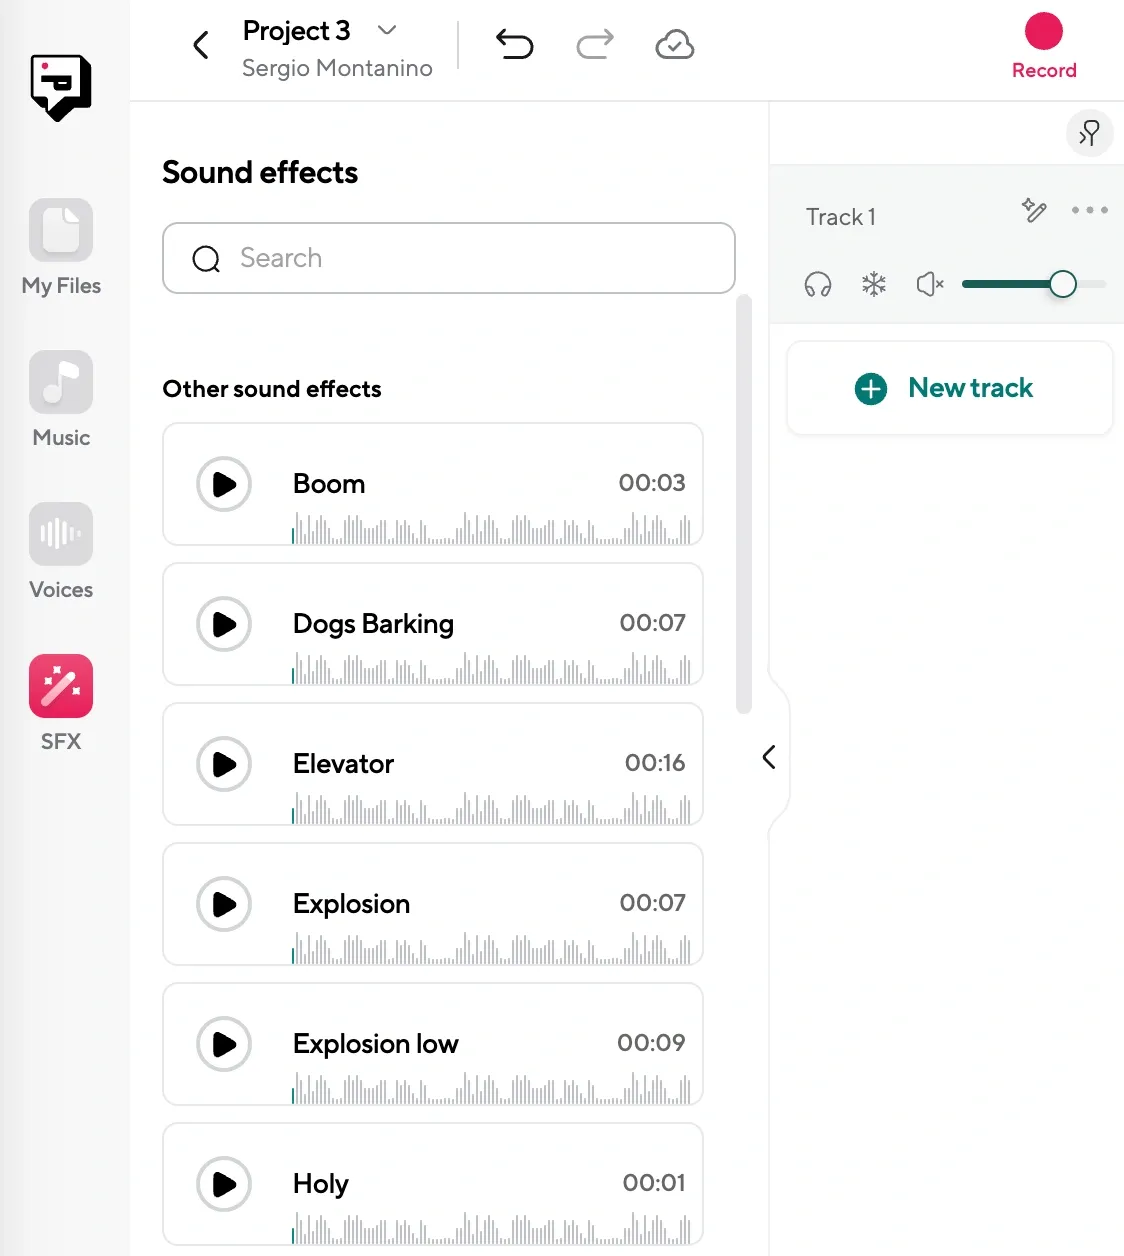
After you’ve made your cut, you can keep editing in the same space. Maybe you want to pull a segment forward, or maybe you want to trim the edges to get rid of background noise. You can also add background music, bring in an AI voiceover, or use Podcastle’s AI audio enhancement tools to clean up your sound. You don’t have to use all the features, but it’s helpful to know they’re there in case your audio needs more than a simple cut.
Step 5: Export your final audio file
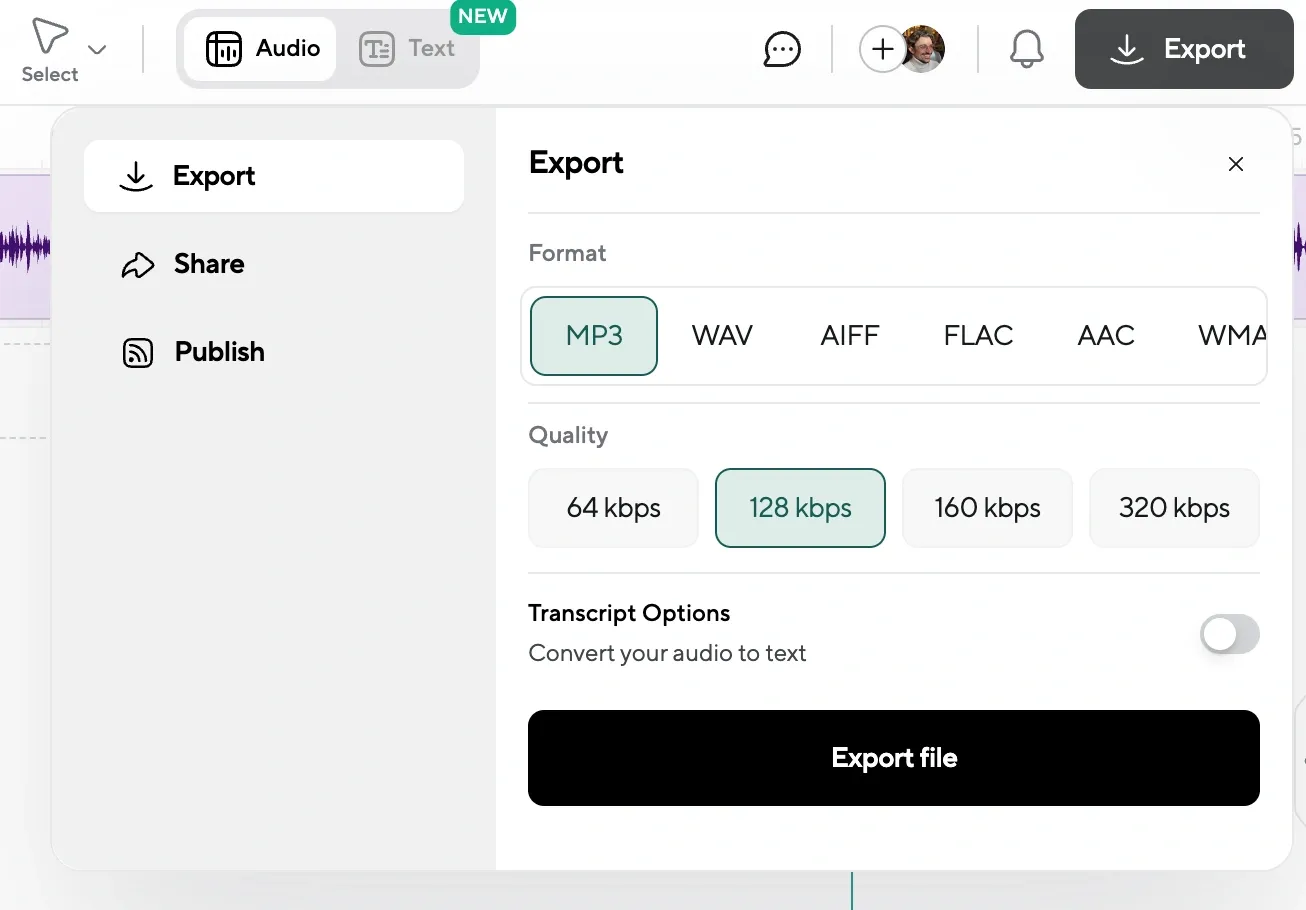
Once everything sounds the way you want, go to the top right corner and export your project. You can choose the format that makes the most sense for your needs (usually MP3 or WAV) and Podcastle will process the file and give you a download link. From there, you’re done. You’ve officially cut and exported an edited piece of audio.
5 Common Issues When Splitting Audio (and How to Fix Them)
Even simple edits can trip you up when you’re still figuring things out. Sometimes the audio doesn’t sound quite right after a cut, or you accidentally trim something you meant to keep. These kinds of issues are normal (they happen to everyone) but they’re easy to fix once you know what to look for.
Here are a few common problems you might run into while cutting audio, and some straightforward ways to fix them without needing to start over.
1. “I made a cut, but now the audio sounds unnatural.”
This usually happens when the cut lands right in the middle of a breath, a word, or a sound that bleeds into the next sentence. It’s easy to miss if you’re editing fast, but when you play it back, you’ll hear that awkward jump.
To fix it, zoom in closely and try nudging the cut forward or backward by a few milliseconds until it falls in a more natural spot. You can also apply a tiny fade in or fade out to smooth the transition so it doesn’t feel like something suddenly disappeared.
2. “There’s a weird clicking or popping noise after my cut.”
That sound usually means you cut in a spot where the waveform didn’t cross the zero line. Basically, the waveform jumped too suddenly, and your ears are picking up on that as a click.
Try making your cut at a point where the waveform touches the center line, or use a fade to soften the edges. A quick 10-millisecond fade on both sides of the cut can go a long way in hiding those little glitches.
3. “I cut too much and lost part of what I wanted to keep.”
Luckily, Podcastle has an undo button, and if you haven’t closed the project, you can usually get your original clip back just by dragging the edge of the segment back out again.
It’s a non-destructive editor, which means the full original audio is still there unless you manually deleted it. This is one of the best safety nets when you’re still learning where and how to cut without overdoing it.
4. “My cuts sound off because the background noise keeps changing.”
If you’re editing a conversation or a long monologue and the background noise shifts between segments, even slightly, it can make cuts feel obvious. This is where enhancement tools can help. In Podcastle, you can use the “Noise Reduction” or "Magic Dust" tool to even things out across the whole file. That way, even if one part was recorded in a slightly different spot or time, it won’t feel so jarring.
5. “I can’t figure out where to cut, it all sounds important.”
This one’s about confidence, not technical ability. A lot of people freeze when editing because they don’t want to mess up something they might need later. If that’s you, try duplicating the track before you edit, and make cuts on the copy. That way, you can experiment without worrying about losing anything. Also, listen for pacing. If a section drags, it usually means there’s something there you can trim, even if it’s just silence or repetition.
5 Advanced Tips to Improve Your Audio Editing
Once you’re comfortable with the basics, you can start looking at audio editing a little differently. Splitting becomes less about removing mistakes and more about shaping how something feels when it’s heard.
1. Learn to spot natural pause points before you record.
One of the best things you can do is start thinking like an editor while you’re still recording. When you pause clearly between thoughts or segments, you give yourself obvious places to cut later. It doesn’t have to be robotic, but even a one-second breath can create enough space that future-you will be grateful for it. It means less slicing in the middle of your words and more clean, quiet gaps to work with.
2. Use fades for polish, not just problem-solving.
Fades aren’t only for covering up bad cuts, they can also make your transitions sound more polished, even if nothing was technically wrong to begin with. If you’re stitching together two clips that were recorded at different times or locations, applying a soft fade at the beginning and end of each one can help everything blend together better. It’s the kind of subtle touch that listeners don’t consciously notice, but they feel it when it’s missing.
3. Stack layers to build atmosphere and structure.
Once you’re comfortable with basic cutting, try layering in background music, ambient sound, or even a second voiceover. Podcastle lets you stack tracks, and once you start doing that, your edits can become less about fixing problems and more about building something that has structure and rhythm. You can fade music in under a segment, or pull it out for emphasis (little things like that change how people hear what you’re saying.)
4. Cut for rhythm, not just for silence.
A lot of beginners make cuts only when there’s a pause, but sometimes a perfectly timed cut happens right in the middle of a sentence, usually after a strong point or a punchline.
When you’re editing, listen not just for noise or filler, but for rhythm. Ask yourself where the beat of the conversation is, and shape your edits around that. If it flows better with a slight pause or even a breath cut short, go with what sounds right.
5. Keep a rough version saved before doing your final draft.
When you get deep into editing, it’s easy to lose sight of what the original recording actually felt like. That’s why it helps to export a rough cut first and take a break. Come back the next day and listen with fresh ears. You’ll be able to hear what’s missing, what feels rushed, and where you can make better cuts. This extra step gives you a cleaner final version, and it saves you from second-guessing yourself while you’re exporting the last file.
Final Thoughts
Cutting and splitting audio might seem like a small part of the editing process, but once you’ve done it a few times, you start to realize how much it shapes everything else. The more you practice it, the less you have to think about it. It just becomes part of how you tell your story.
If you’re using Podcastle, you’ve already got the tools in front of you to cut cleanly, edit confidently, and start building audio projects that actually feel like something you’d want to share. So don’t overthink it. Open a project. Make a few cuts. Move things around. Listen back. Trust your ears. If something feels too long, it probably is. If something doesn’t sound right, go in and fix it.