Sometimes it’s not the mic. It’s the mess in the background.
The AC hum, the street noise, the echo bouncing off your kitchen walls because your desk is next to the fridge... Every creator, at some point, hits record and hopes for the best. And for a long time, “hoping for the best” meant re-recording, editing for hours, or giving up and living with a subpar final cut.
But improving audio quality doesn’t have to take hours. It can take seconds. And it doesn’t have to sound “okay.” It can sound clear, warm, and professional, even if your setup isn’t.
Let’s walk through how you can clean up your audio using Podcastle, starting with your raw recording and ending with something you’d be proud to publish. Then, we’ll get into why audio quality matters, when it actually doesn’t, and a few troubleshooting tips for when things still don’t sound right.
How to Improve Audio Quality in Just 3 Steps
Step 1: Upload Your Audio to Podcastle
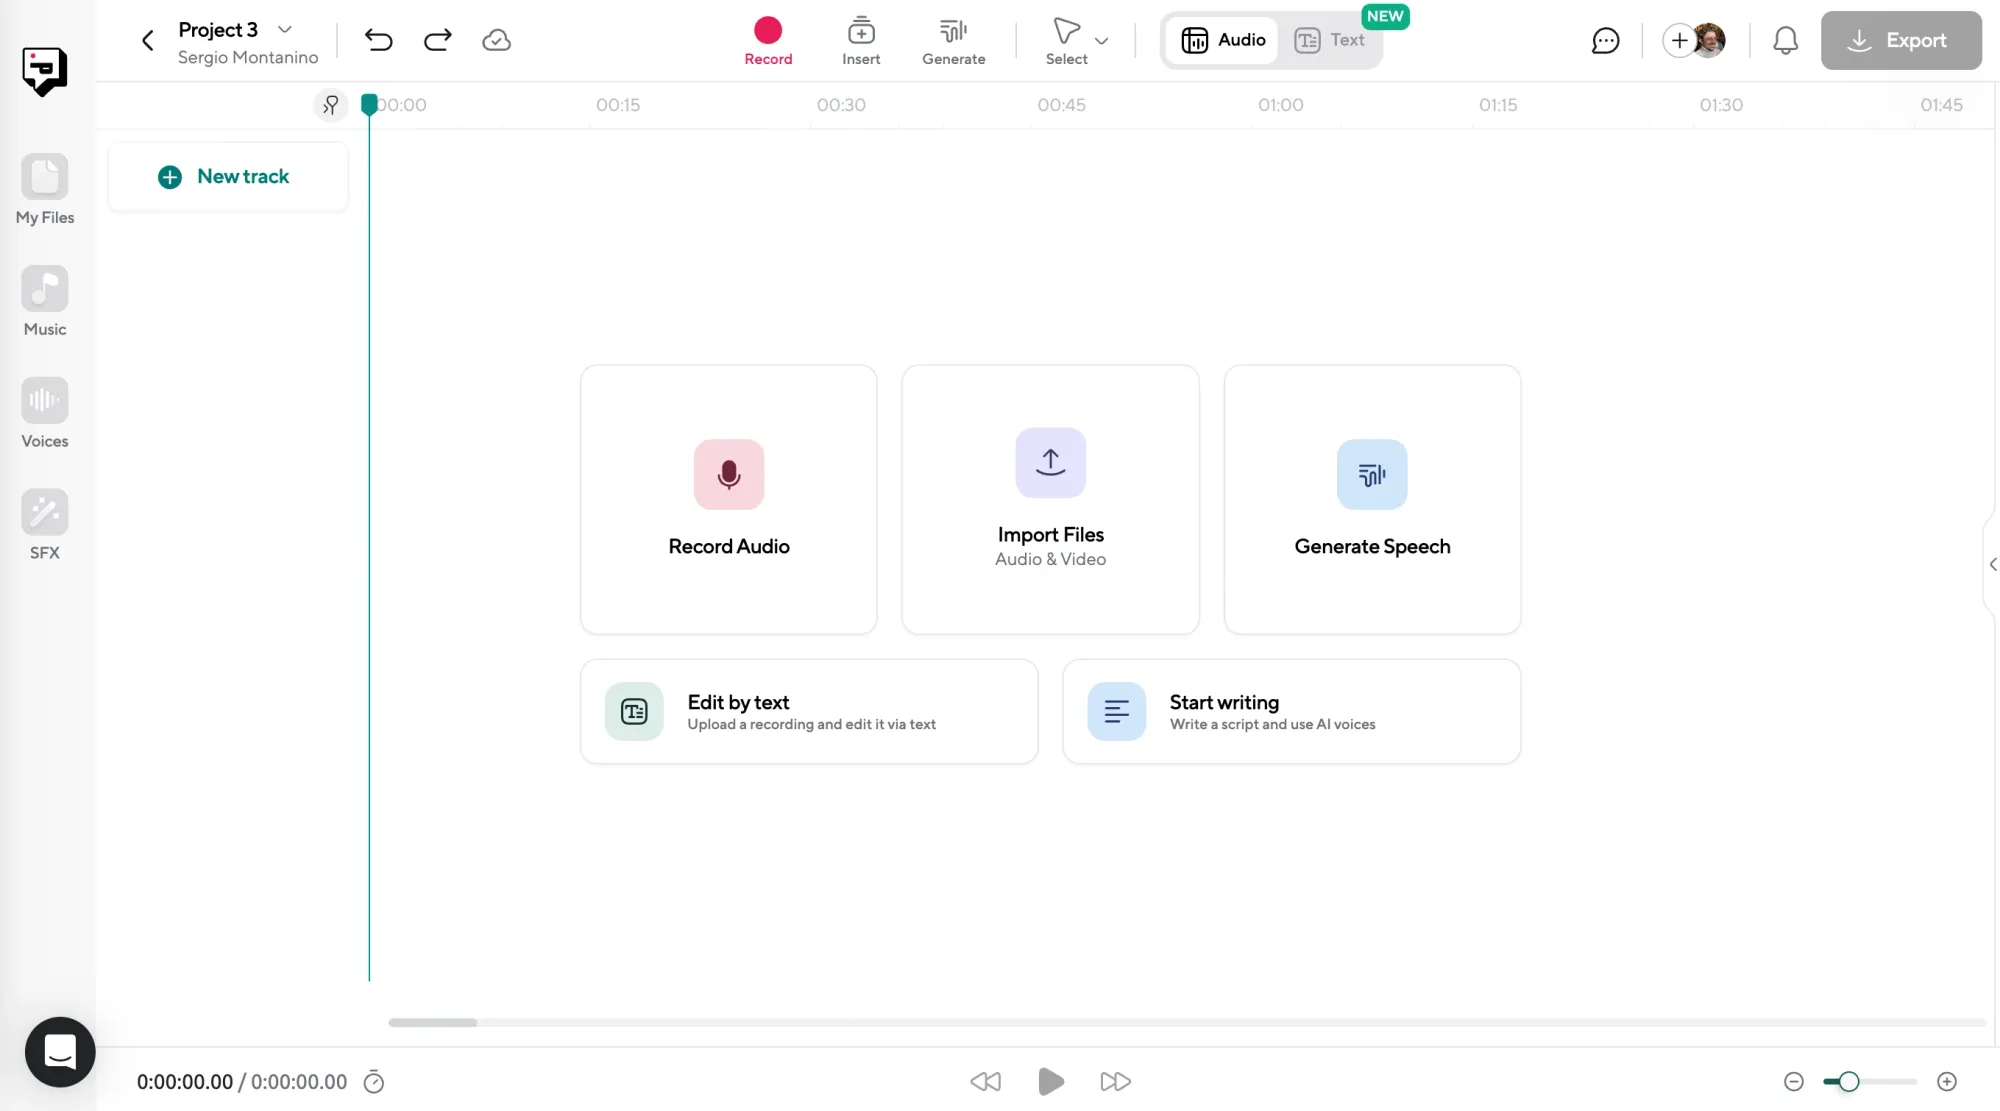
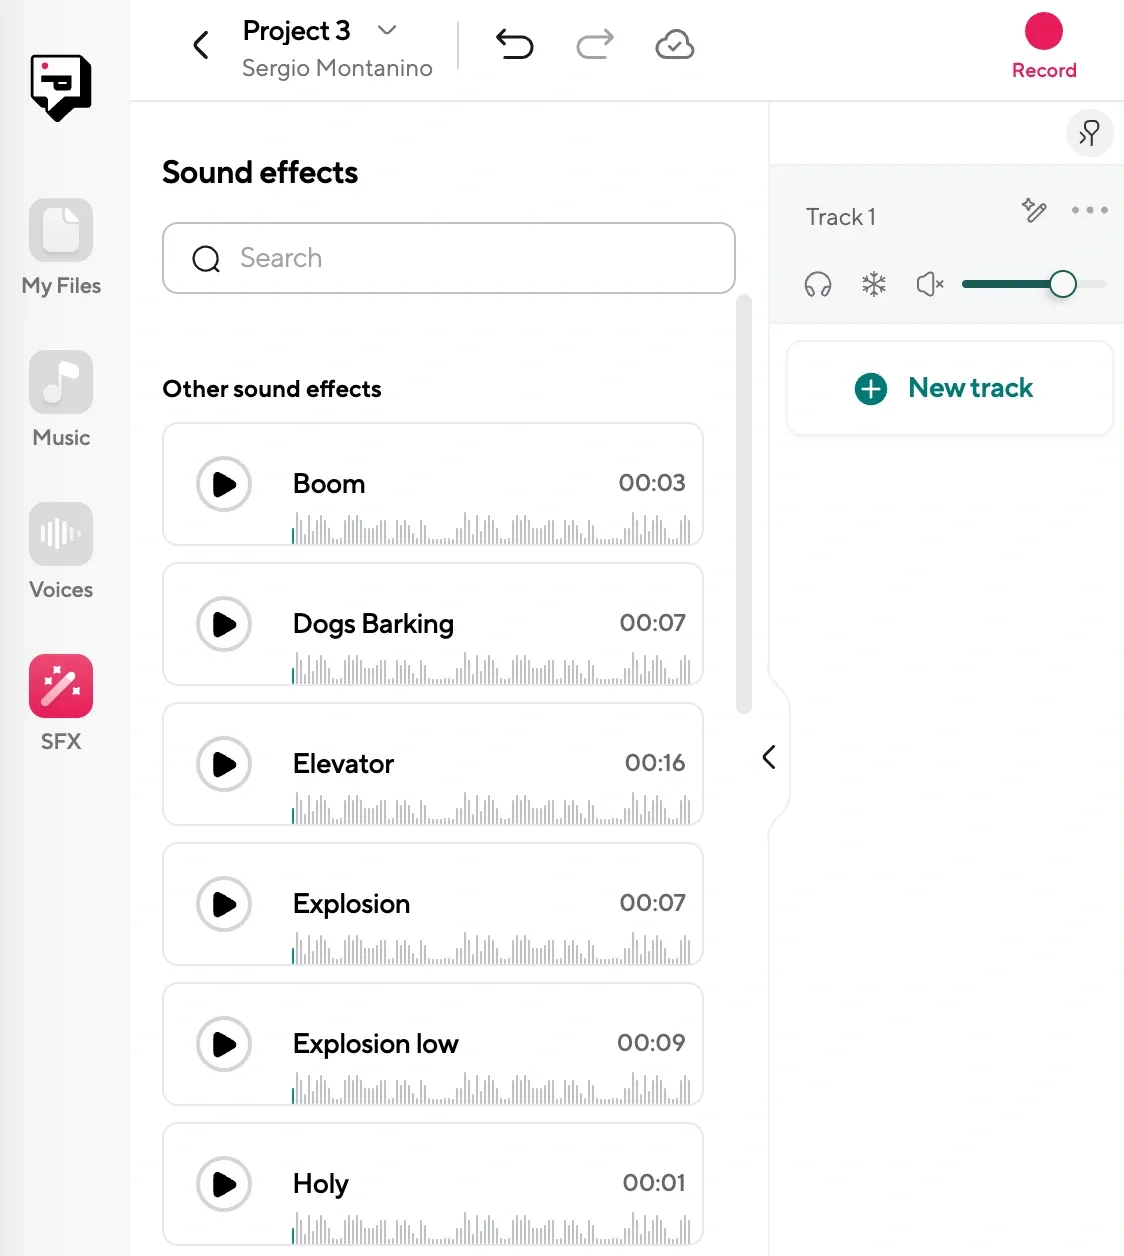
Once you’re inside Podcastle, click into the project you want to work on. If you’re starting fresh, open up the Audio Editor. This is where the magic happens. You can drag and drop your recorded file directly into the editor or upload it through the menu. Whether you recorded with Podcastle, Zoom, your phone, or even a shaky third-party app, you can bring it here.
Step 2: Click “AI Assistant” and Use Magic Dust
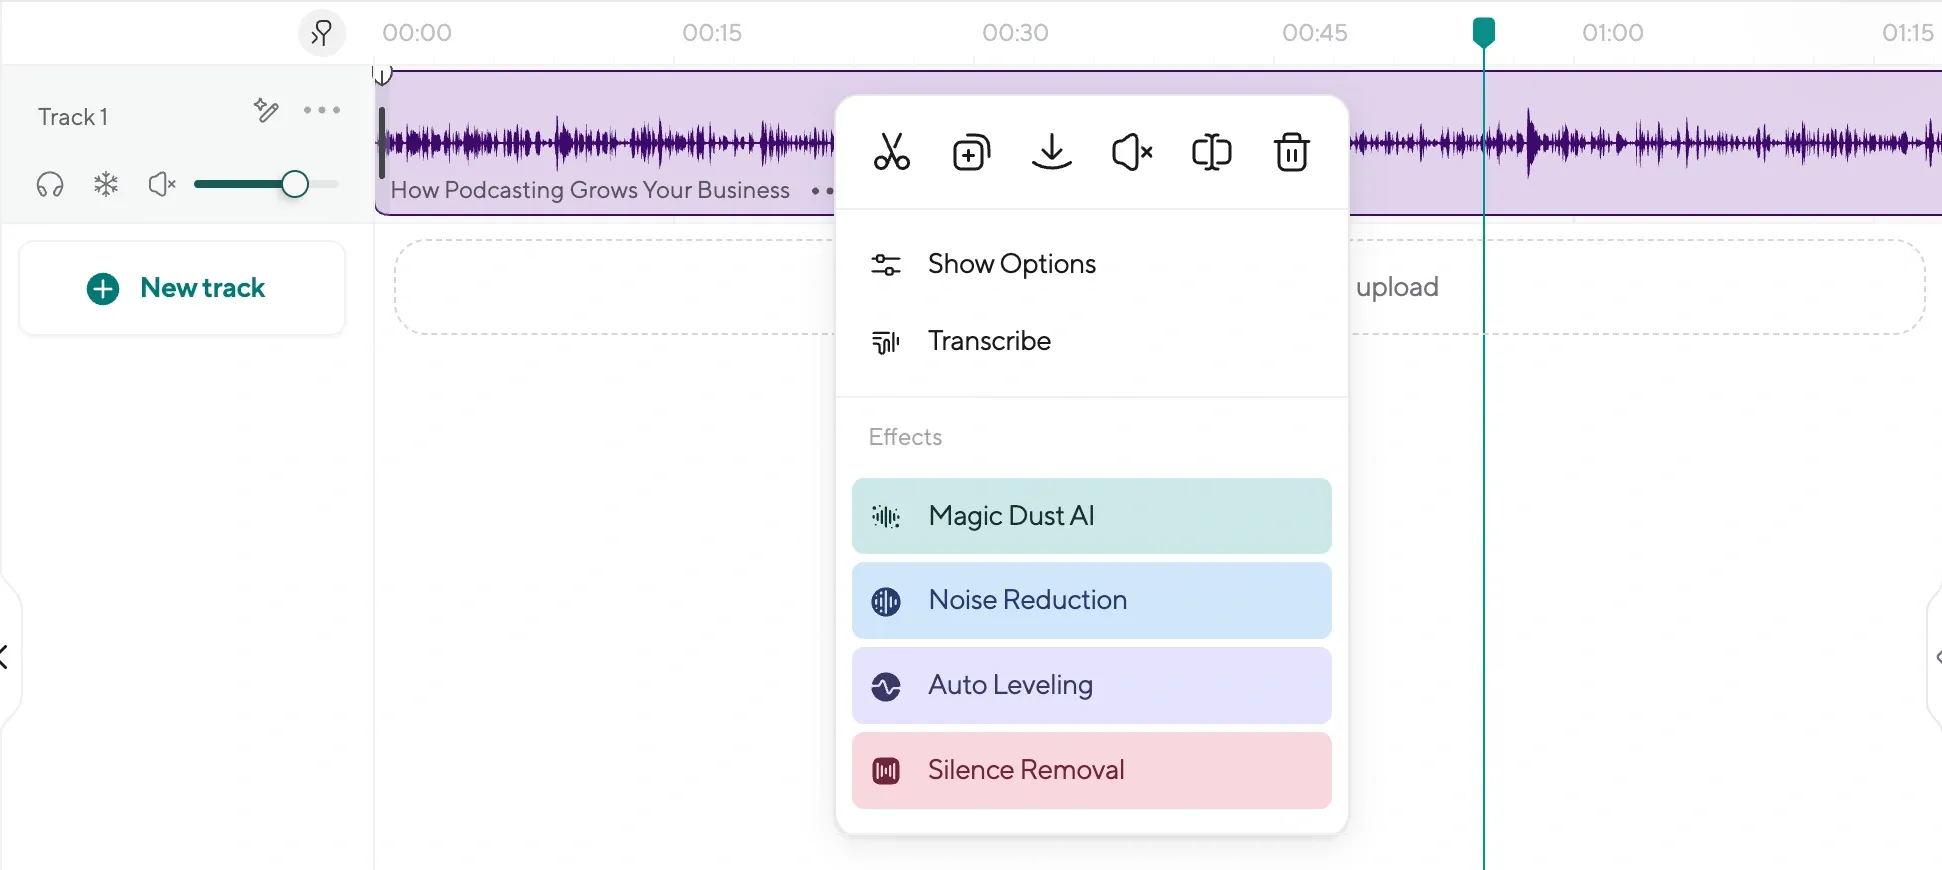
This part is almost too easy. Once your file is uploaded, click the AI Assistant tab on the right. You’ll see a feature called Magic Dust. This is your one-click audio fixer. Behind the scenes, it runs advanced processing that removes background noise, fixes uneven levels, polishes your vocals, and gives everything that clean, studio-level sound.
Step 3: Make Final Edits or Add Extras
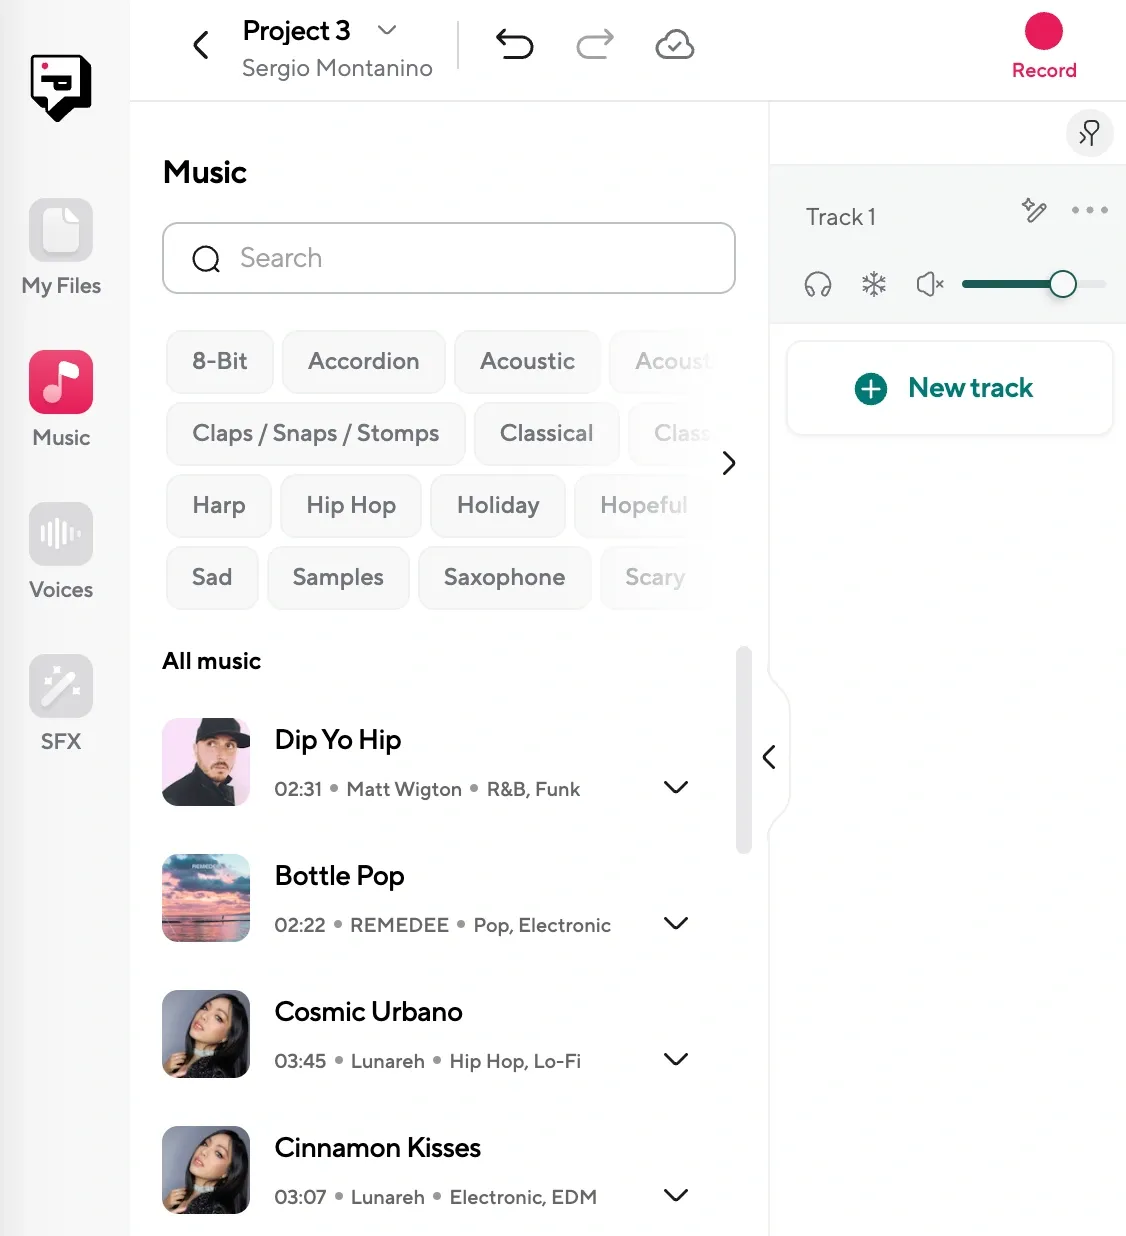
After the cleanup, you can tweak the waveform directly in the editor. Trim awkward pauses. Add AI voiceovers from a list of 1000+ realistic voices, if you want narration. Drop in background music or sound effects from the built-in stock library. You can even layer voice tracks if you’re working on a scripted piece. Once it sounds the way you want, export the file in your preferred format like MP3, WAV, or whatever fits your workflow.
Why Audio Quality NEEDS to Sound Good
Listening to bad audio is physically exhausting. When someone has to strain to hear you over the background hum or turn the volume up and down every few seconds, the experience becomes frustrating, and that frustration makes it harder to connect with what you’re saying.
Clean audio gives your voice weight. It sounds more intentional, more trustworthy. When your audio is smooth and balanced, people stop thinking about the production and start paying attention to the content. And this applies even if you’re just recording in your bedroom with a basic setup. You don’t need a fancy mic or a treated room. You just need clarity.
But that doesn’t mean everything has to be perfectly polished. Think of a creator filming a spontaneous voice memo while walking through the city. There’s traffic, people talking in the background, maybe even a bit of wind. But it feels real. If your content is meant to be raw, chaotic, or off-the-cuff, cleaning it too much can make it feel sterile. The goal is to be intentional.
5 Tips for Good Quality Audio From the Get-Go
You can fix a lot in post-production, but the cleaner your recording is from the start, the better everything sounds later on.
Here are five practical ways to get cleaner audio right from the moment you hit record.
1. Record in a smaller, quieter space with soft surfaces
Smaller rooms work best, especially if they’ve got carpet, curtains, or furniture that absorbs sound. Hard, empty spaces with bare walls and tile floors tend to echo, and even AI can struggle to fix that kind of reverb without making your voice sound weird or processed.
2. Put the mic close to your mouth, but not too close
A lot of people either sit too far away or end up too close and breathe right into the mic. You want to stay about six inches away: enough to capture a warm, full voice without popping every “P” or hissing every “S.”
If you’re using a USB mic or headset, angle it slightly off-center so you’re not speaking directly into the capsule. That one little adjustment can make a big difference in how clean the final take sounds.
3. Use headphones while recording to prevent echo
Even if you’re recording solo, headphones matter. Without them, your mic might pick up whatever sound is coming out of your speakers, and that creates subtle echo or even feedback. It’s the kind of thing you might not notice while recording, but it shows up later and can be hard to get rid of without affecting the clarity of your voice.
4. Turn off anything in the room that makes noise, even quietly
Background noise doesn’t have to be loud to ruin a take. Air conditioners, computer fans, humming refrigerators, buzzing lights, these all get picked up. Even if your ears tune it out, your mic doesn’t. Before you hit record, take ten seconds to listen to the room in silence. If you hear anything steady, try to switch it off, unplug it, or record somewhere else.
5. Do a quick test recording before the real thing
You don’t want to find out ten minutes into a great take that your mic was muted or your voice is peaking. Always record a short test clip first. Speak at your natural volume, play it back, and listen on headphones. Make sure it sounds balanced, clear, and free of background surprises.
When to Use AI to Improve Audio Quality
Here are a few situations where AI helps content creators get the sound quality they need without completely reworking their process or re-recording their content.
1. Recording Outside on a Busy Street
Imagine a vlogger or street journalist trying to capture their thoughts in the middle of a bustling city. Even if they speak clearly into a decent mic, the background noise competes with their voice, making it difficult to follow what they’re saying.
When they upload the file into Podcastle and apply Magic Dust, the difference is immediate. The cars, footsteps, and chatter soften into the background, while their voice becomes more present and easier to focus on.
2. Recording in an Echoey Environment
A wine podcaster decides to record an episode from a cellar to capture the vibe of the location. The problem is, stone walls and arched ceilings bounce sound everywhere. Every word feels like it’s bouncing back at the mic, creating an echo that distracts from the content.
This is based on a true story! Instead of re-recording elsewhere or accepting the echo, this podcast creator who hosts "Read Between the Wines" uploaded the track into Podcastle and let Magic Dust do its work. The AI reduces the reverb without muting the character of the space. The final result still feels like it was recorded in a unique location, but the voice is no longer lost in the room.
3. Creating Without Equipment (or a Studio)
A creator has something to say. They have a good idea. But they don’t have a treated room, or sound panels, or a $300 mic with a boom arm and pop filter. They might be working from a bedroom, or a shared living space, or maybe they’re using the mic built into their $25 earbuds.
This is where AI cleanup really matters. After recording, they upload the file and clean it up with one click. Background hum disappears. The recording stops sounding like a voice memo. It might not become completely flawless, but it’s polished enough that people will stay and listen.
4. Capturing Audio On-the-Go
Sometimes the best thoughts show up when no one’s planning to hit record. A content creator has an idea in the car, pulls out their phone, and starts talking into a voice memo app while parked. There’s ambient noise, the fan’s running, maybe there’s rain on the windshield, maybe traffic is rolling by. It’s not ideal, but they record anyway, because the idea feels worth capturing.
With Podcastle, they can clean that file up later. The fan fades out. The traffic loses its edge. The voice becomes the main event, and that spontaneous moment turns into usable content.
Common Mistakes that Make Audio Sound Bad
Even with powerful tools like Magic Dust, some habits and recording choices can hold back your audio quality. AI can only do so much if the original file is too far gone.
Here are five of the most common mistakes creators make, even after using cleanup tools, and what to do instead:
1. Recording too far from the mic
The further you are from your mic, the more your voice blends into the room. Even with noise reduction, distant audio always sounds thin and flat. To fix this, get as close to your mic as possible without distorting. Ideally, you want to be around six inches away and speak at a consistent volume.
2. Using the wrong input source
You’d be surprised how often people record using their laptop mic without realizing it. Always double-check your input settings before recording. Make sure your external mic is selected, and run a quick test to confirm the sound is coming through the right device.
3. Over-editing the final cut
Some creators get carried away trying to remove every breath, pause, or stutter. This can make your speech sound robotic or unnatural. Keep it human. Clean up what’s distracting, but leave room for rhythm and personality.
4. Adding music or effects that overpower the voice
The voice should always be the focus. If your background music is too loud or has similar frequencies, it can compete with what you’re saying. Choose tracks that sit lower in the mix and complement your tone. Always preview your audio on headphones before exporting.
5. Exporting in low quality
After all the cleanup and editing, exporting your file at a low bitrate (like 96 kbps) can undo the clarity you just worked for. Aim for 256 kbps or higher when exporting MP3s, or use WAV if you want uncompressed quality.
Final Thoughts
You don’t need a fancy studio or $500 mic to sound professional. You just need the right tool and a few minutes. With Podcastle’s AI tools, you can clean up messy recordings, add polish, and walk away with something you’re proud to publish. And the best part? You’ll spend more time creating and less time fixing.Ready to try it for yourself? Jump into Podcastle and test out Magic Dust on your next project.